Using this device in direct sunlight, extreme heat or humidity, excessive dust or dirt,
excessive vibrations, close to magnetic or electromagnetic fields can cause
malfunctions.
Track8 follows a simple and consistent interaction model. This page explains
the core concepts — for the exhaustive, per-screen list of every control see
the Controls & Shortcuts Reference.
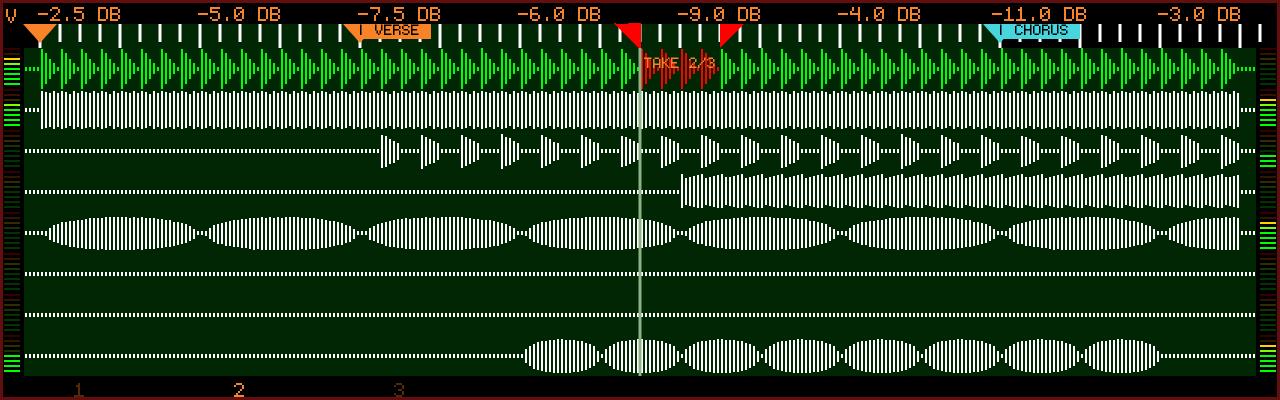
A red border around the screen edges means record is armed (faded) or a
take is rolling (solid). It is visible on every screen (new in v1.2.1)
While a take is rolling, actions that would break the recording (changing
BPM, switching the record domain, opening heavy screens) are refused with
an on-screen error instead of silently stopping the take (new in v1.2.1)
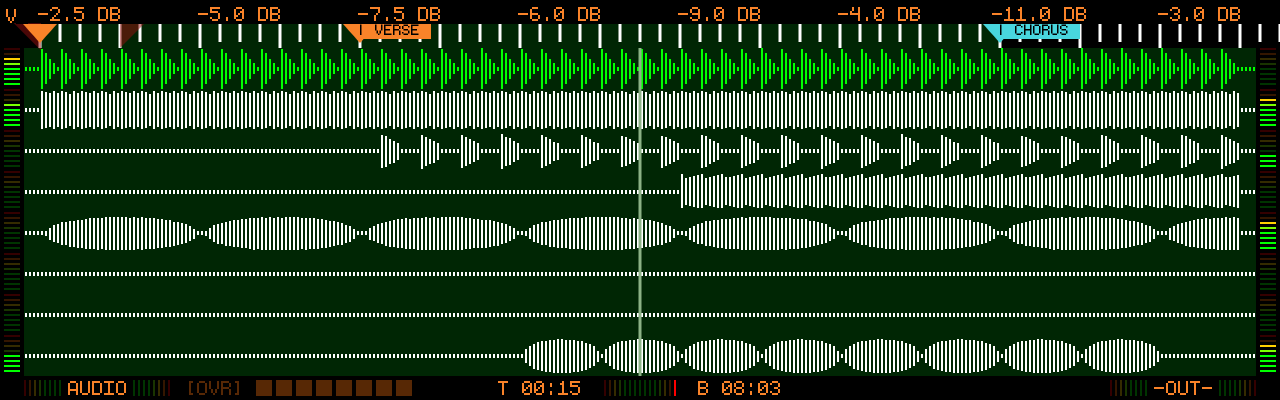
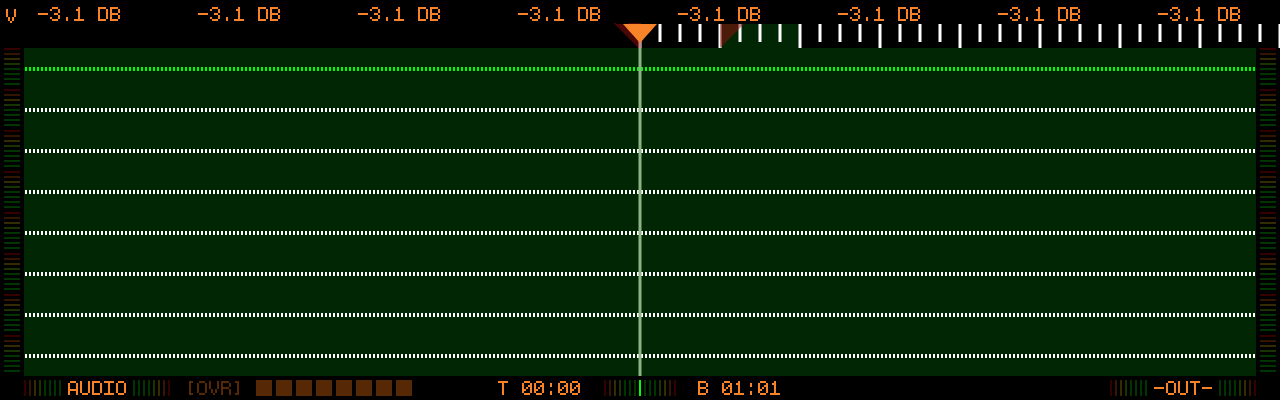
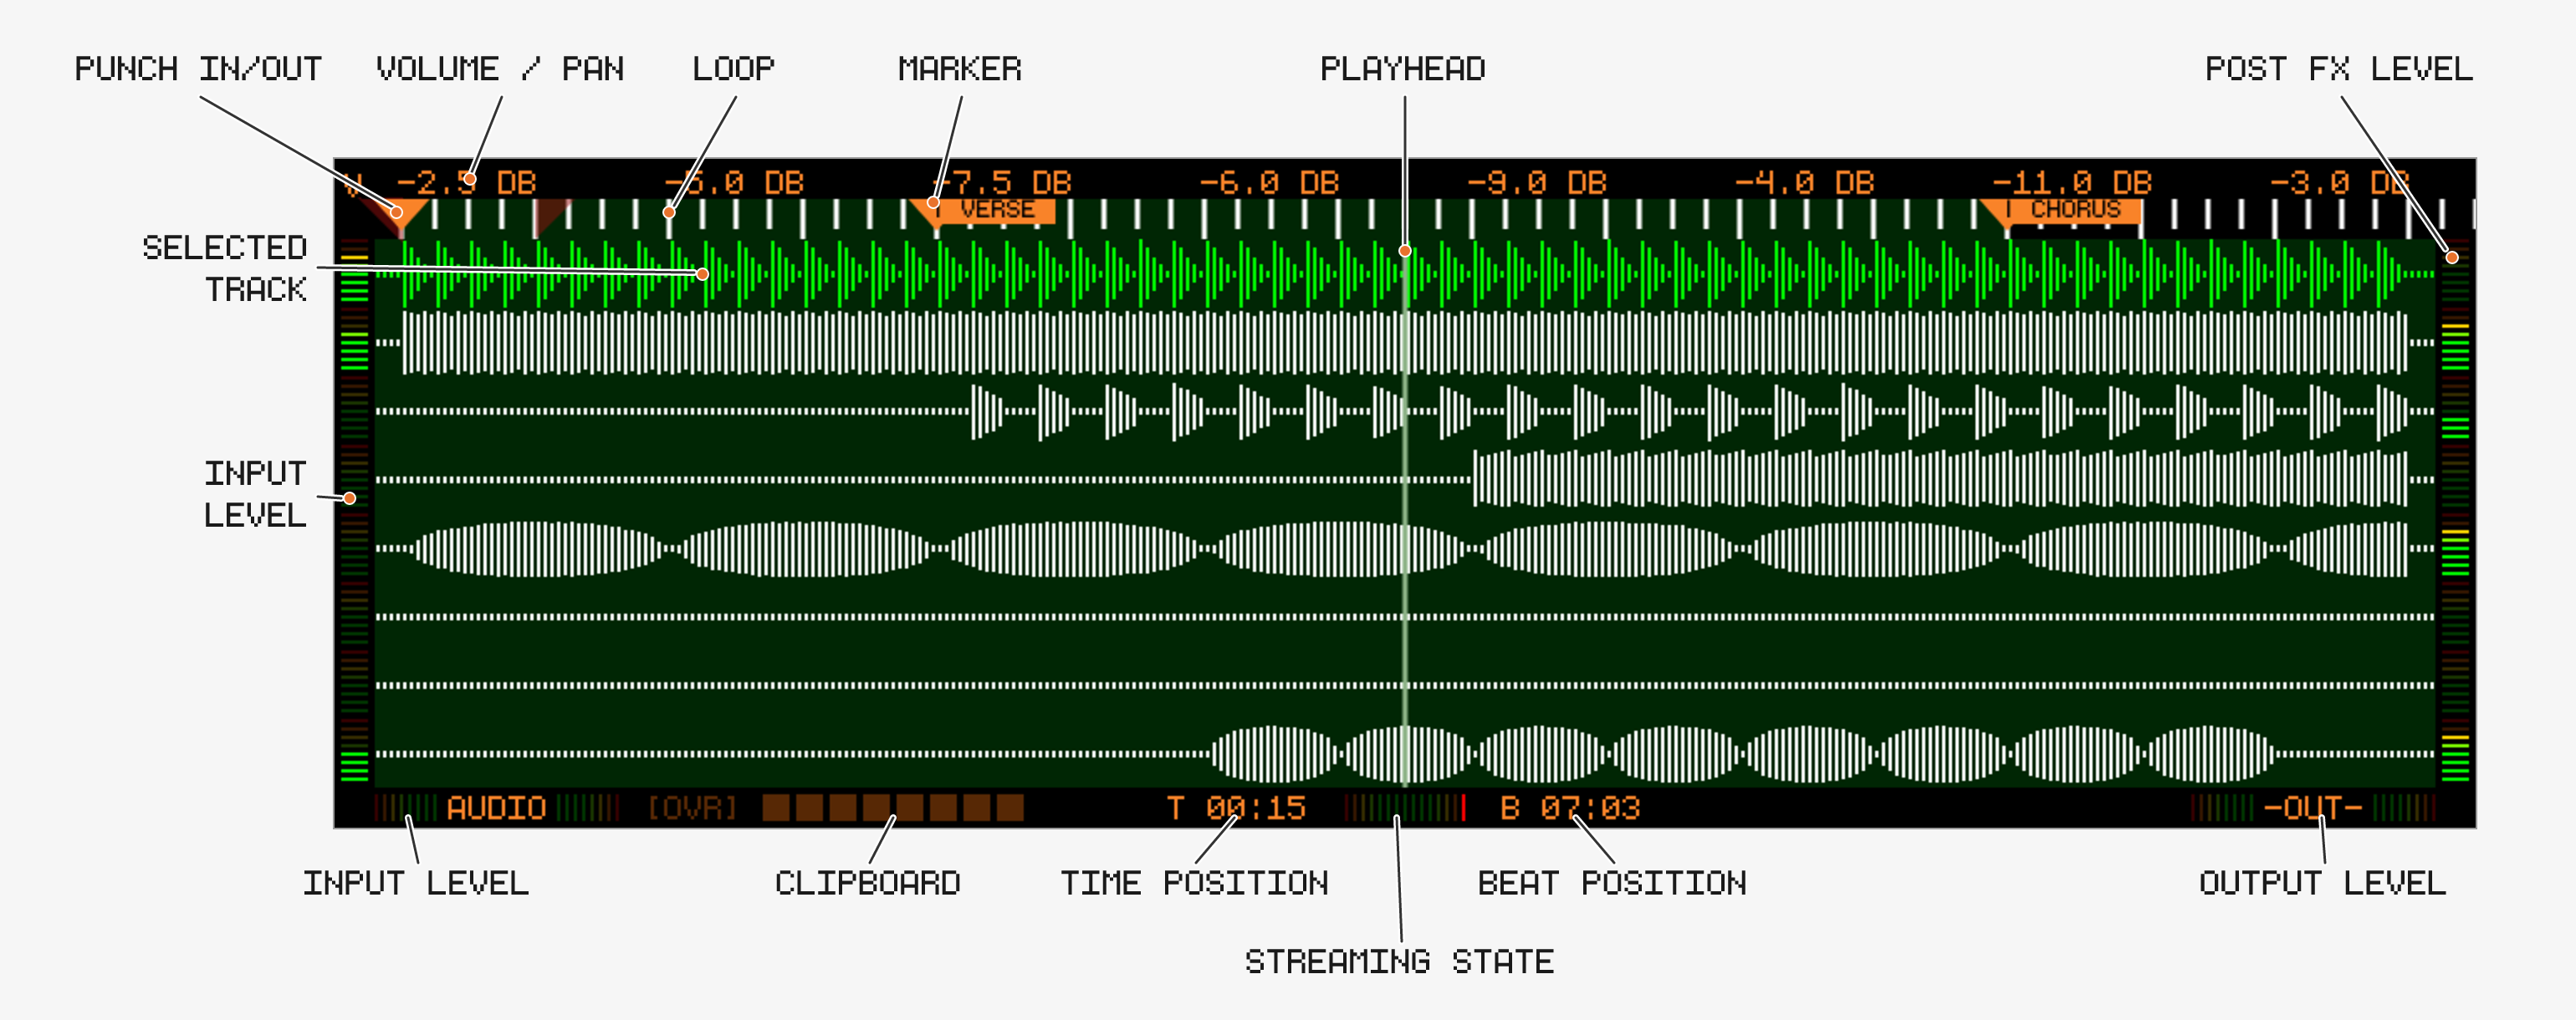
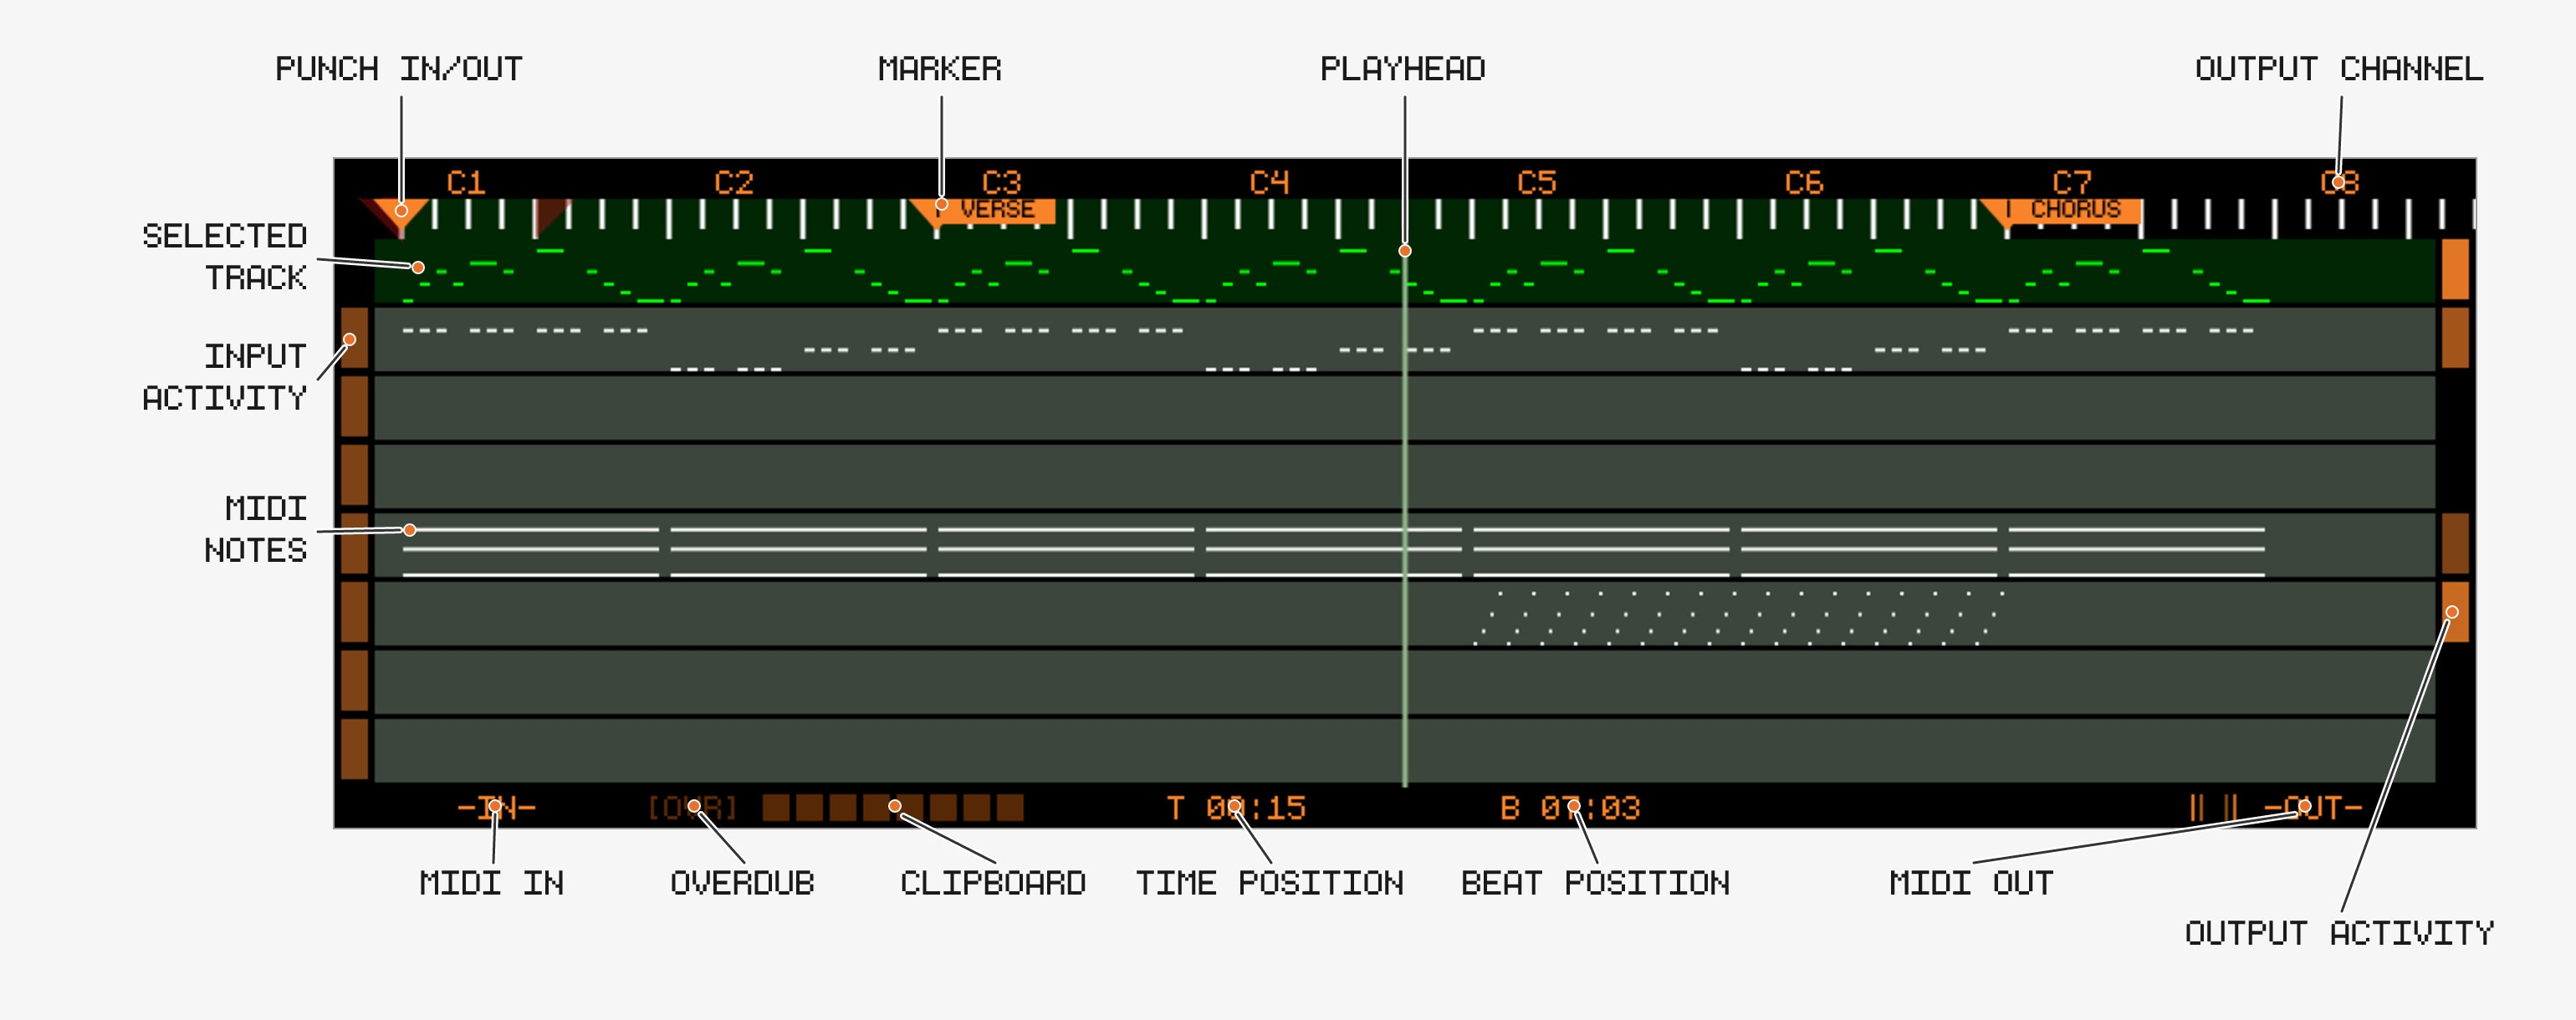
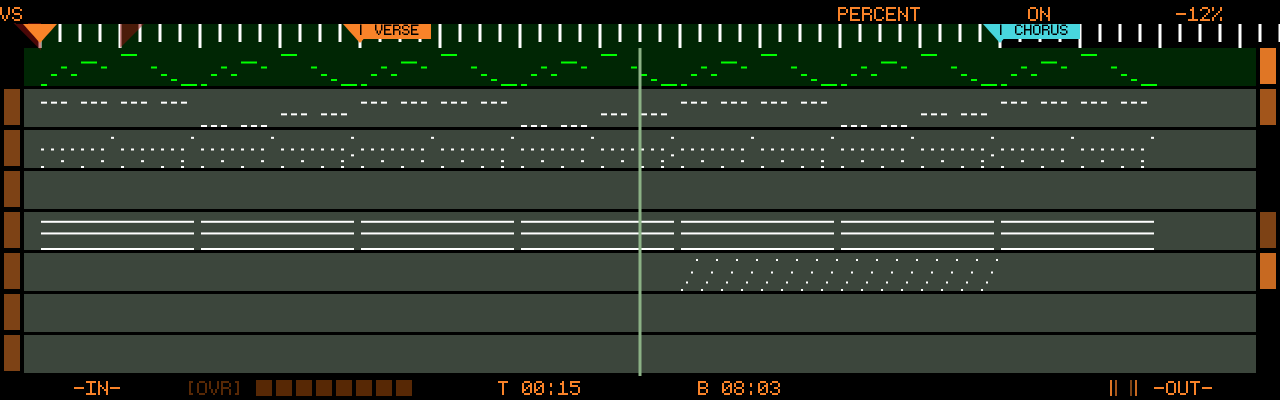
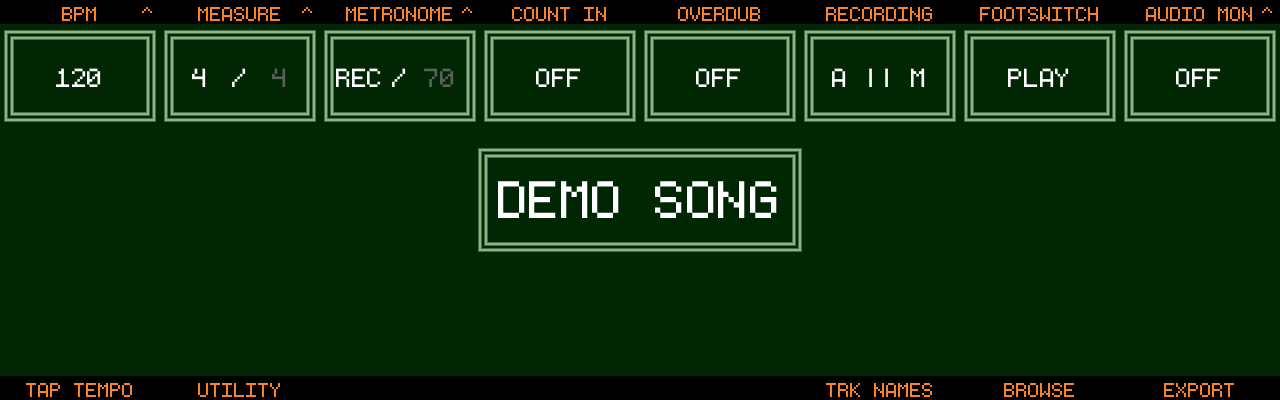
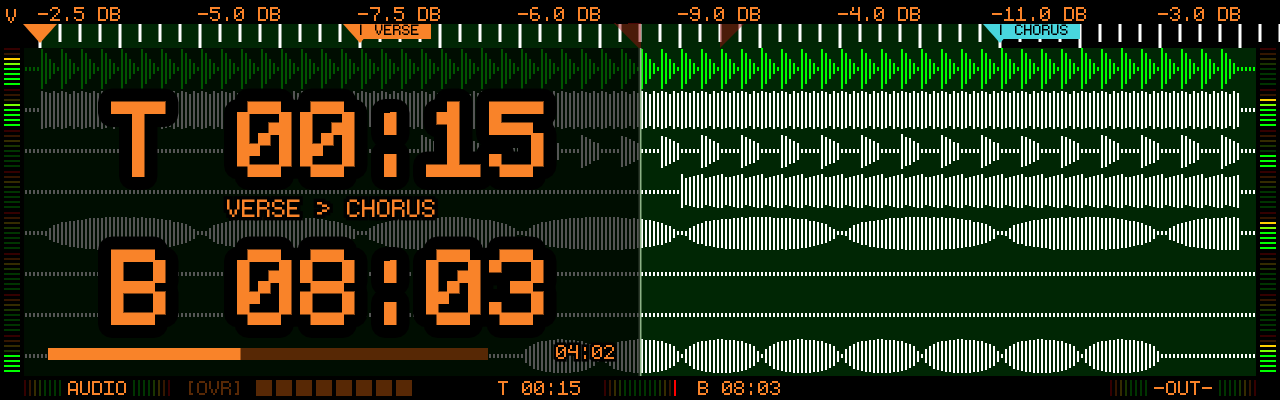
The status bar at the bottom of the Overview screens shows the active
recording mode, the overdub state and the current time/beat position.
Bars and beats are counted from 1, so the start of the tape reads
01:01 (changed in v1.2.1 — it used to read 00:01):
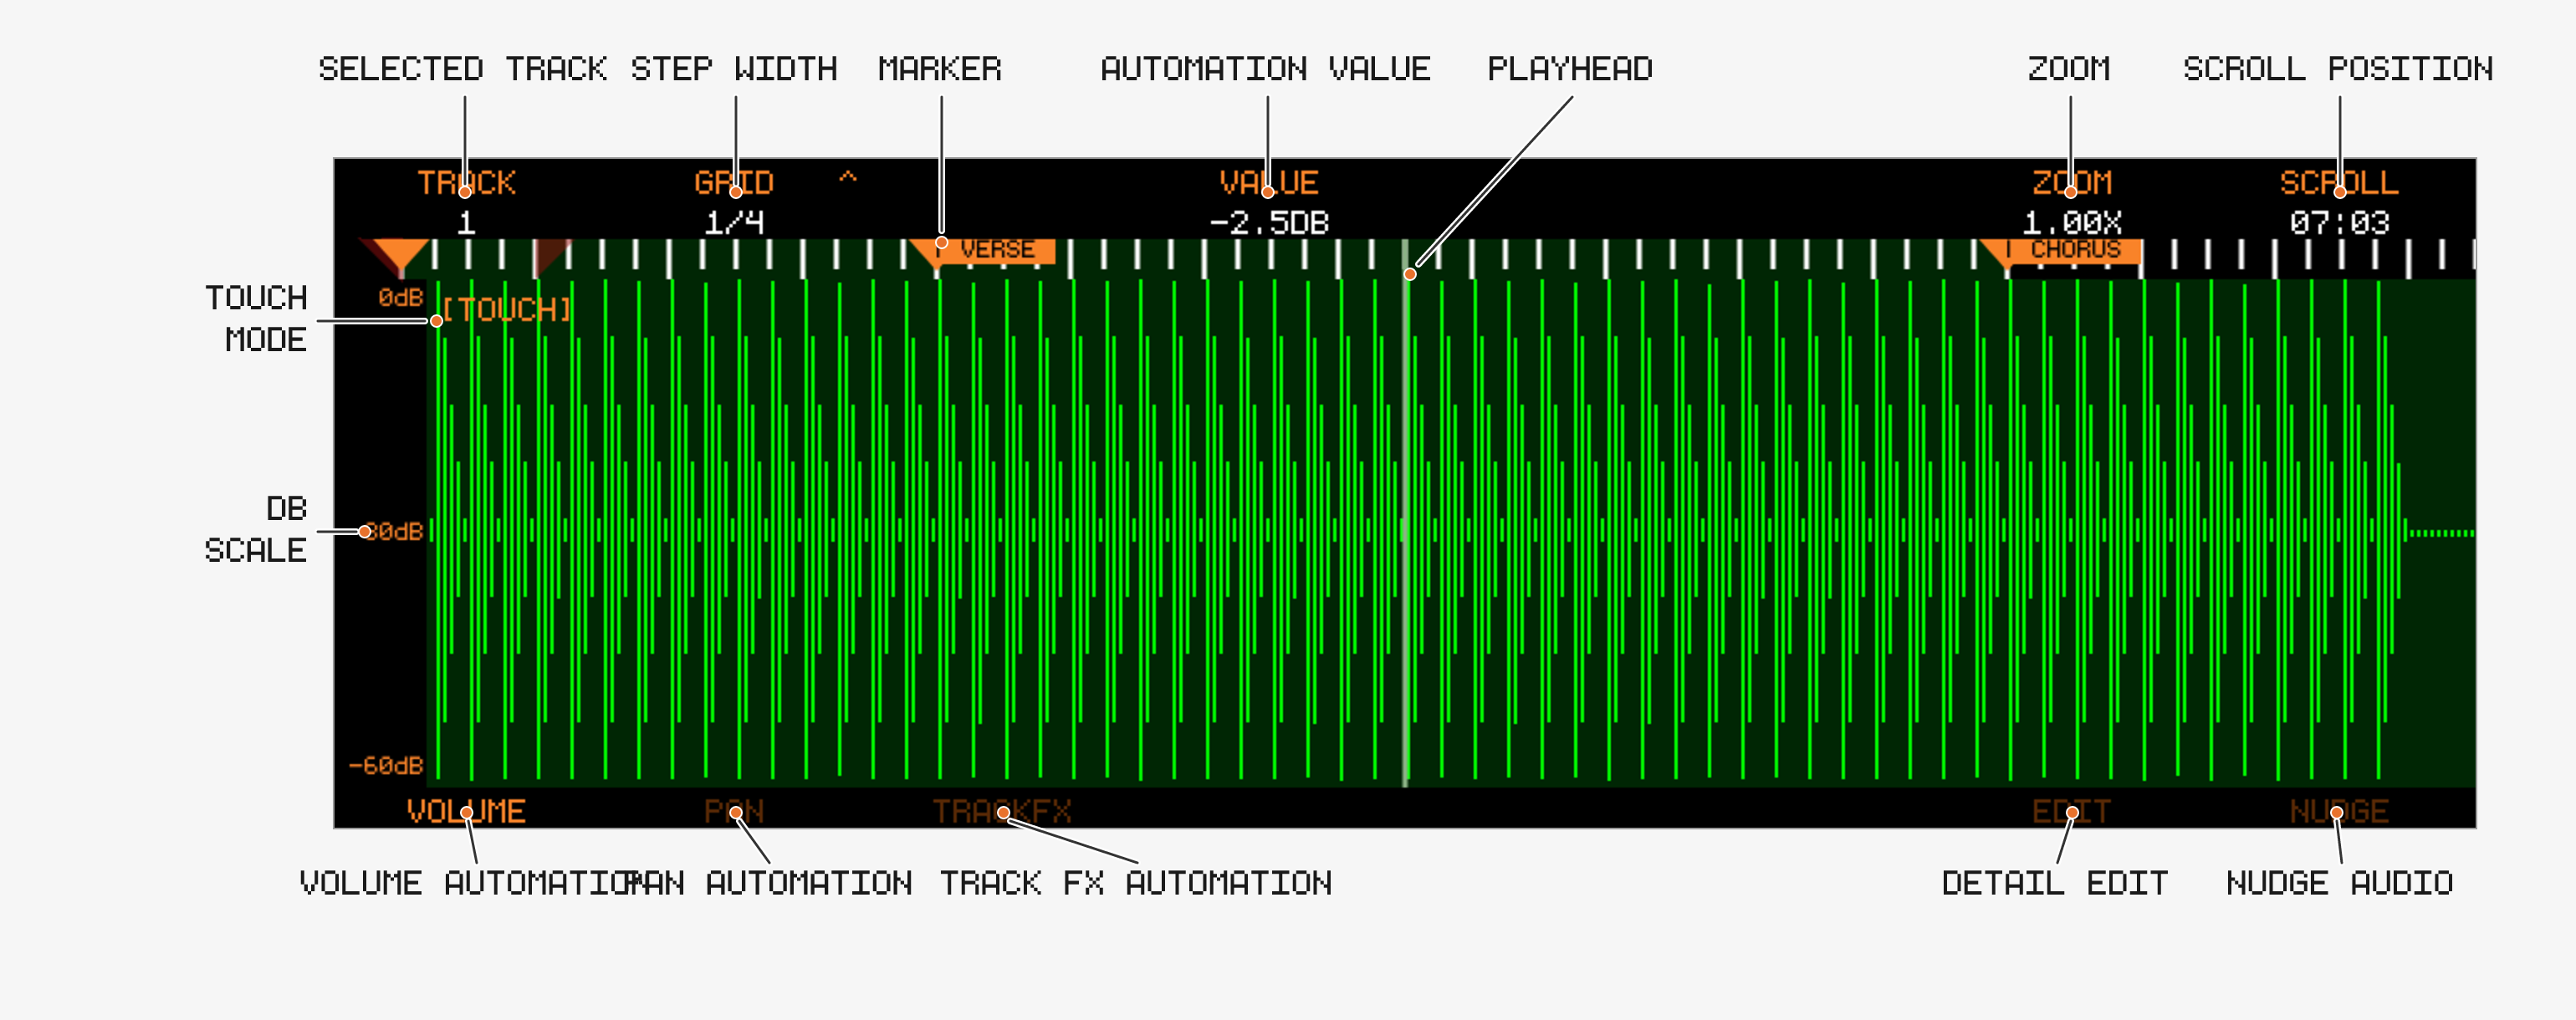
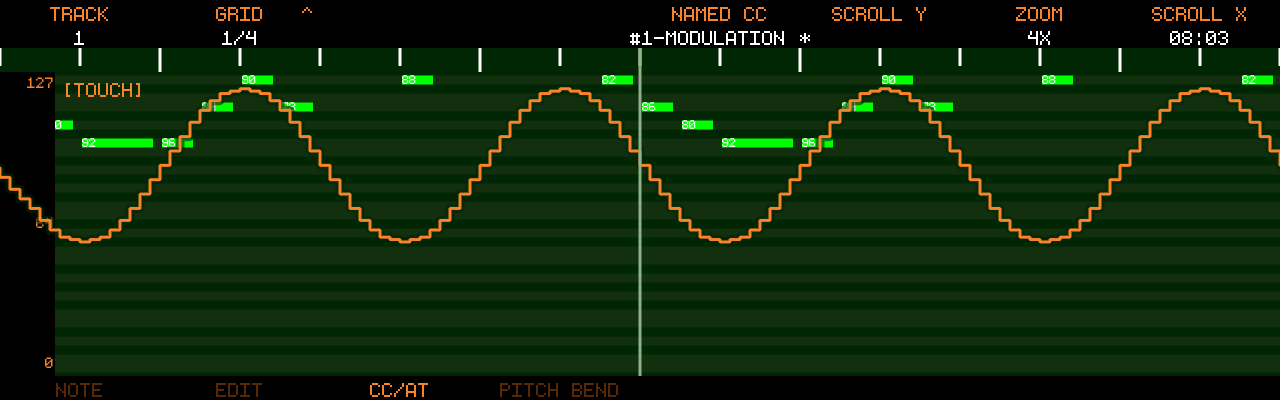
Screens that accept touch input show a small [TOUCH] indicator
(new in v1.2.1)
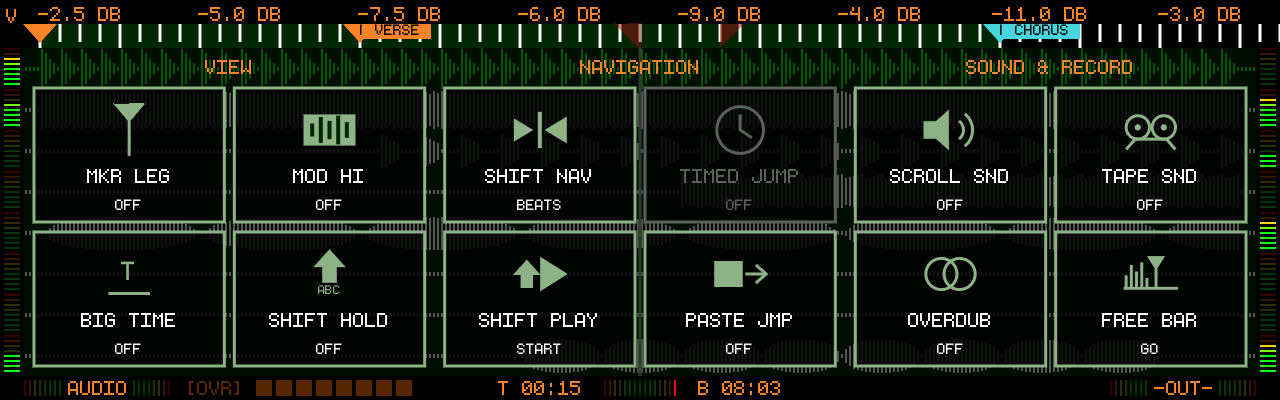
Quick Settings: touch and hold the track area of the Audio or MIDI
Overview for about a second to open a panel of the everyday toggles that
otherwise live on the Utility screen (since v1.2.2):
VIEW: MKR LEG, MOD HI, BIG TIME, SHIFT HOLD — NAVIGATION: SHIFT NAV,
TIMED JUMP, SHIFT PLAY, PASTE JMP — SOUND & RECORD: SCROLL SND, TAPE SND,
OVERDUB, FREE BAR
Touch a tile to switch it (TIMED JUMP, SHIFT PLAY and TAPE SND cycle
through their values); lit tiles are on. TIMED JUMP is greyed out while
SHIFT NAV is set to BEATS
FREE BAR is the one tile that acts instead of switching: it closes the
panel and moves the playhead to the next empty bar on the tape — the next
place to paste or record without erasing anything. See
FREE BAR. Greyed out while recording
Touch anywhere outside the tiles to close the panel. Any button or encoder
closes it as well and still does its normal job — Play plays, the screen
keys switch screens
A short tap on the tracks still does what it always did (e.g. touching a
marker edits its label), and the panel is a shortcut only: every setting
stays on the Utility screen
A USB mouse scroll wheel or a jog wheel behaves like the SCROLL
encoder in the Audio/MIDI Overview and Edit views (since v1.1.1)
Hold Audio + Track Button — solo/unsolo an audio track on the Audio
Overview (since v1.1.2)
Hold Midi + Track Button — solo/unsolo a MIDI track on the Midi
Overview (since v1.1.2)
Hold Audio + Midi, then press a Track Button — select the same
track for both Audio and MIDI (since v1.1.3)
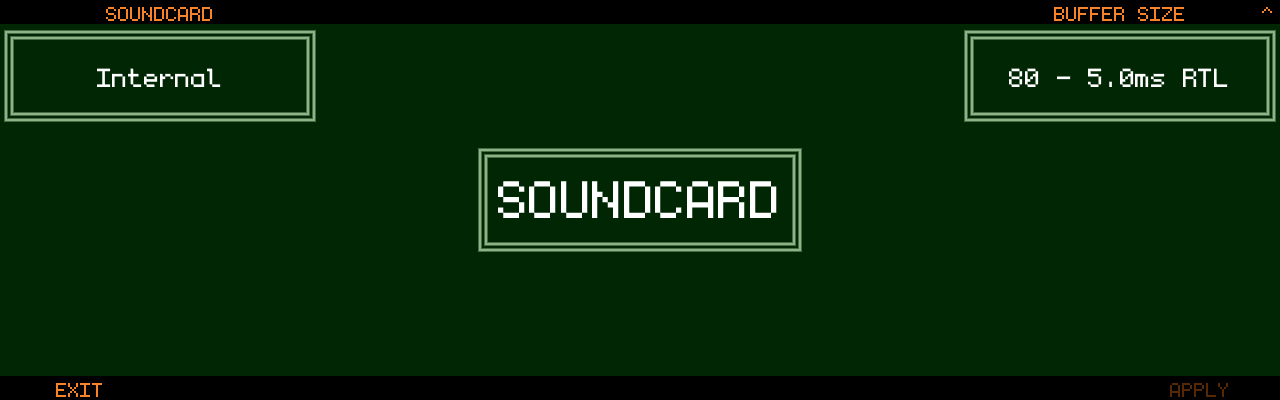
Hold Settings, then press Audio — open the Soundcard settings
Hold Settings, then press Midi — open the MIDI settings
Hold Loop + Cut/Copy/Paste — arrange the current loop region: all unmuted tracks (a soloed track counts as the only unmuted one), Audio + MIDI, with the Markers inside the loop
instead of marker bounds (Audio Overview since v1.2.1,
MIDI Overview since v1.2.2)
Press Loop In + Loop Out together — set the loop region to the
surrounding marker bounds; with SHIFT the punch region (since v1.2.0)
After a paste the playhead can jump to the end of the pasted region to chain
pastes into a repeating pattern — enable PASTE JMP in Utility
(since v1.2.0). Pasted/modified areas can be highlighted in orange via
MOD HI in Utility (since v1.1.4).
Jump to Tape Start — or to the first Marker, configurable via SHIFT PLAY in Utility (since v1.1.5) — or to the start marker whenever one is flagged (new in v1.2.2)
Jump one Beat or one Marker to the Left (SHIFT NAV in Utility)
Jump one Beat or one Marker to the Right (SHIFT NAV in Utility)
The Left/Right buttons also navigate the tape while on the Track FX, Master
FX and Mastering screens (new in v1.2.1).
This page is generated from the firmware source (the per-screen control description tables) and lists what every hardware control does on each screen.
Turn and Push are the two encoder actions. “Shift + …” applies while SHIFT is held or latched. A dash (—) means the control has no separate function in that state.
These button functions apply on every screen. Screens that reassign a button list the change in their own section below.
Button
Action
Shift + Button
Audio
Audio
Audio Edit
MIDI
MIDI
MIDI Edit
Master FX
Master FX
Track FX
Settings
Settings
USB Browser
Play
Play/Pause
Jump to start
Record
Record
Undo
Loop / Loop In / Loop Out
Toggle Loop, set In / Out, hold [ + ] to set from marker bounds, hold Loop + Cut/Copy/Paste to arrange the loop region (all Tracks, Audio + MIDI + Markers)
Toggle Punch, set In / Out, hold [ + ] to set from marker bounds
Cut Point
Create Marker / remove the Marker at the playhead (locked markers are kept)
Clear all unlocked Markers
Cut / Copy / Paste
Cut, Copy, Paste selected Track
Cut, Copy all unmuted Tracks (a soloed Track counts as the only unmuted one). Paste to bounce
MOVE MARKER: with the playhead on a marker, turn to stage a move of that marker, one Scroll step per click (CW later, CCW earlier). Locked markers move too
Push → apply the staged move
Encoder 5
SPLICE: turn to stage blank time at the playhead, one Scroll step per click (CW inserts, CCW removes). Moves all tracks, MIDI and markers
MOVE MARKER: with the playhead on a marker, turn to stage a move of that marker, one Scroll step per click (CW later, CCW earlier). Locked markers move too
Push → apply the staged move
Encoder 5
SPLICE: turn to stage blank time at the playhead, one Scroll step per click (CW inserts, CCW removes). Moves all tracks, audio and markers
Push to cycle. OFF / ON / PUNCH (monitor only inside the punch brackets). Audio: disable when using Speakers and a Microphone. Midi: controls input echo to Midi Out
Encoders with Shift held
Encoder
Turn
Push
Encoder 1
BPM in steps of 10
Push to switch between whole BPM and decimals
Encoder 2
Measure
Push to cycle
Encoder 6
Recording Mode
Audio AND Midi / Audio OR Midi
Encoder 7
Change what the 1/4“ Footswitch does
—
Encoder 8
Audio Mon / Midi Mon
Push to cycle. OFF / ON / PUNCH (monitor only inside the punch brackets). Audio: disable when using Speakers and a Microphone. Midi: controls input echo to Midi Out
Push to cycle. OFF / ON / PUNCH (monitor only inside the punch brackets). Audio: disable when using Speakers and a Microphone. Midi: controls input echo to Midi Out
Encoders with Shift held
Encoder
Turn
Push
Encoder 1
BPM in steps of 0.1
Push to switch between whole BPM and decimals
Encoder 2
Measure
Push to cycle
Encoder 6
Recording Mode
Audio AND Midi / Audio OR Midi
Encoder 7
Change what the 1/4“ Footswitch does
—
Encoder 8
Audio Mon / Midi Mon
Push to cycle. OFF / ON / PUNCH (monitor only inside the punch brackets). Audio: disable when using Speakers and a Microphone. Midi: controls input echo to Midi Out
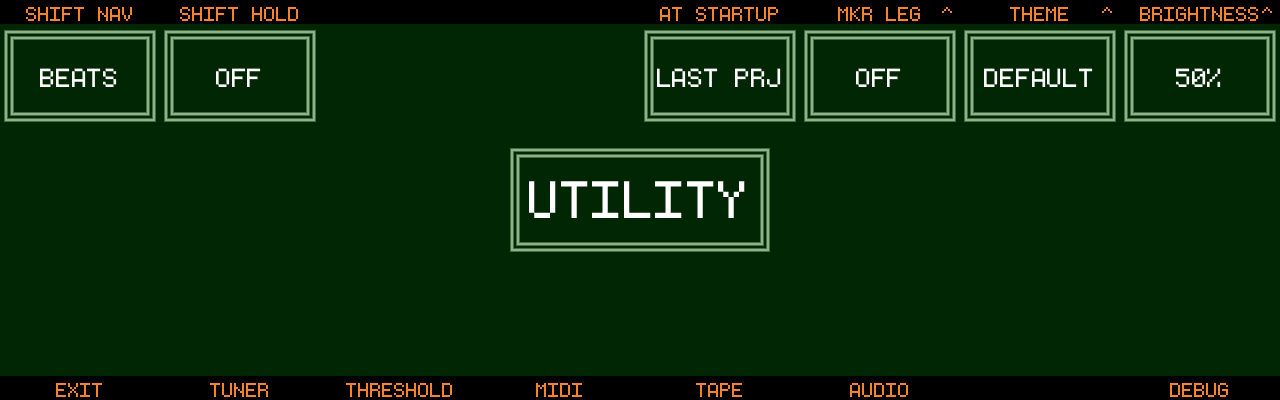
Marker Legs / Modified Highlight / Scroll Sound / SHIFT Play target (overridden by a start marker: START MKR) / Paste Jump / Tape Stop Sound / Big Time
Push to cycle
Encoder 7
Theme / Shader (OFF, BLOOM, CRT, SCANLINE, SOFT, SHARP, CUSTOM when bin/static/bloom.glsl exists) / Temp (colour temperature 2500–6500 K)
Push to cycle
Encoder 8
Brightness / Standby
Push to toggle
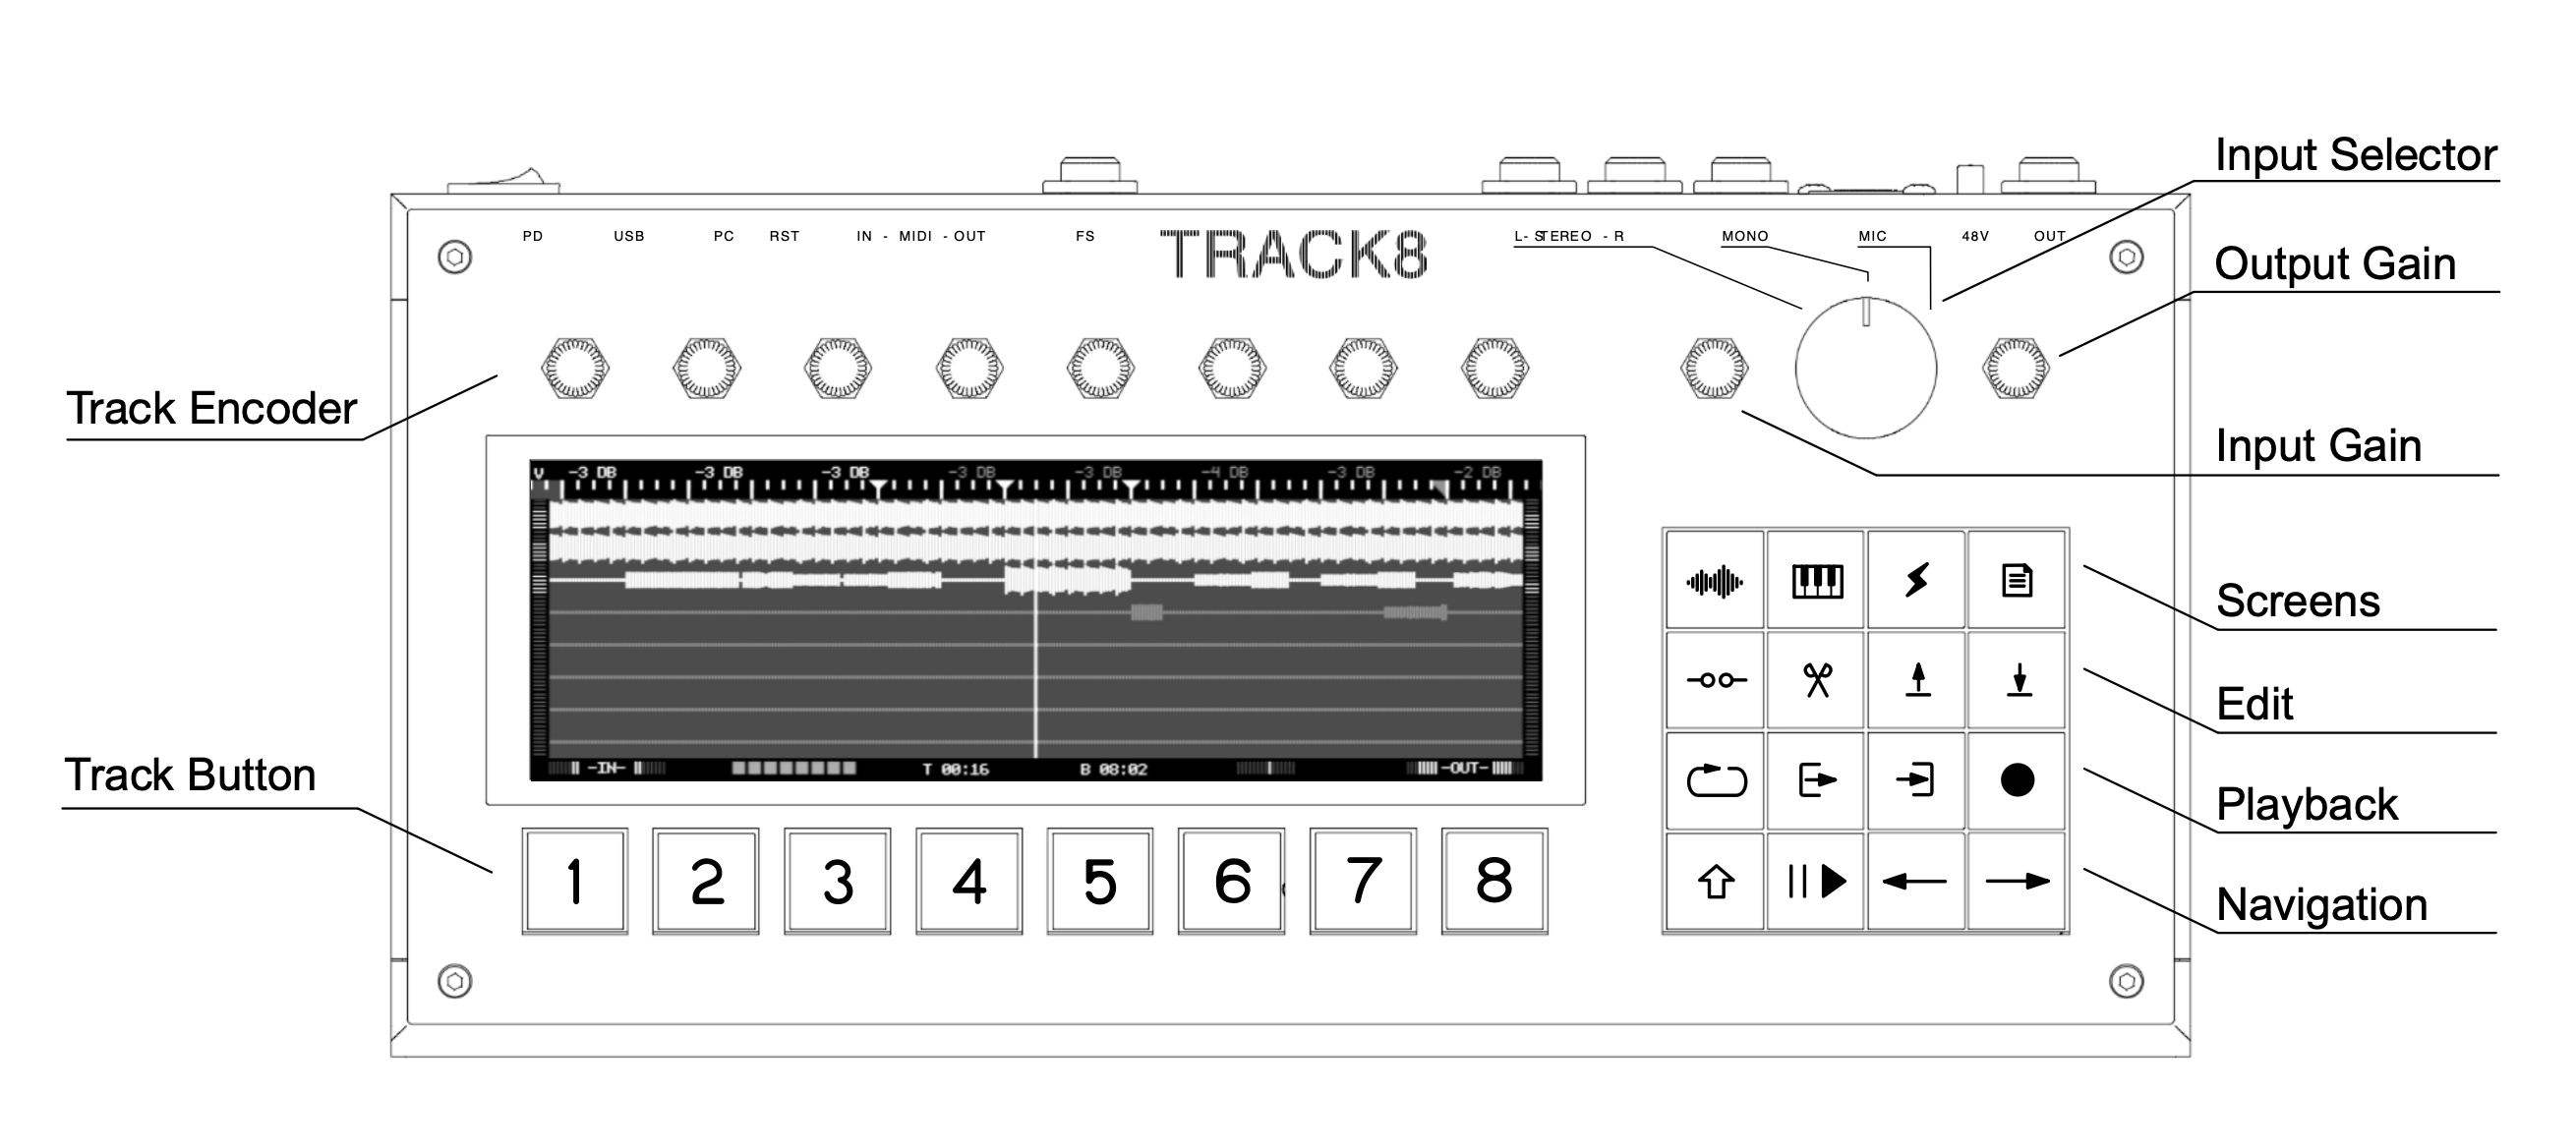
Track buttons
Track button
Action
1
Exit to Project Settings
The transport, edit, navigation and screen-select buttons have no labelled function on this screen.
Multi allows to record more than 1 Track at a time
—
Encoder 6
Fallback to 44.1k
Degrades audio
Encoder 7
Some Interfaces might need a higher Buffer
—
Track buttons
Track button
Action
1
Exit to Project Settings
The transport, edit, navigation and screen-select buttons have no labelled function on this screen.
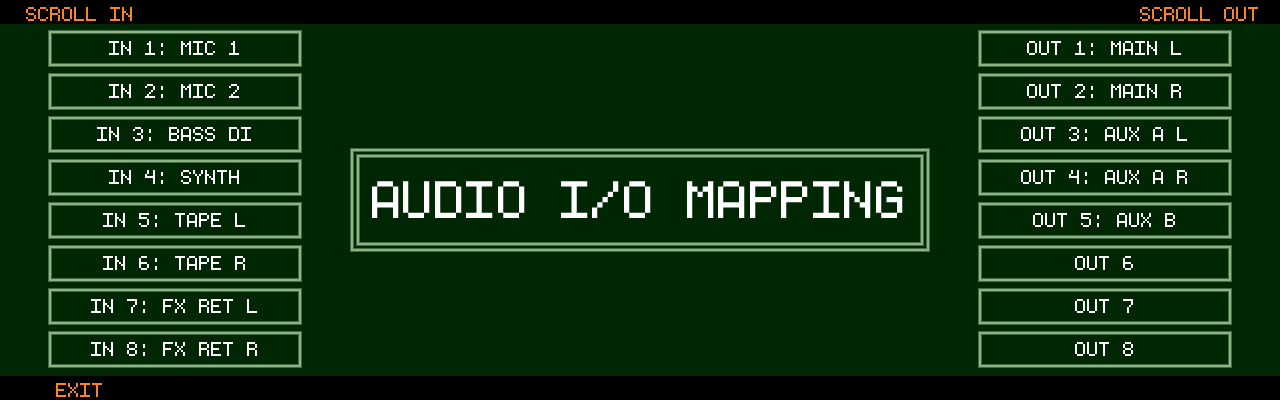
Screens not listed here (project save/rename/import dialogs, audio I/O mapping pages, MIDI mapping pages, firmware update) use the standard controls shown on screen.
Press any encoder to cycle through the encoder modes:
VOLUME → level (per track)
PAN → stereo position (per track)
SCROLL → timeline navigation (Encoder 1 sets the scroll increment, Encoder 8 scrolls, Encoder 3 → MOVE MARKER, Encoder 5 → SPLICE, Encoder 7 zooms the timeline 0.25x to 4x (since v1.2.2)). While SCROLL is active, the beat ruler shows the scroll increment as shorter ticks between the beats, like the grid on Audio Edit (since v1.2.2)
REC OFFSET → per-track record offset, 0 to -50 ms (since v1.1.4)
RETURN MIX / RETURN VOL → return signal balance and level (external soundcards only)
Press again while on the Audio Overview to switch to the Track Mixer (new in v1.2.1)
+ → Audio Edit. The edit view opens on the parameter you last adjusted with an encoder — turn a Volume/Pan/Send encoder, then + to edit its automation directly (new in v1.2.1)
Open up blank bars at the playhead, or remove bars so everything after closes the gap — the two things a razor blade does on real tape. One splice moves everything behind the splice point: all 8 audio tracks with their automation, all MIDI tracks, and the markers, loop and punch points.
Select the SCROLL encoder mode. Encoder 5 becomes SPLICE
Turn Encoder 5 clockwise to stage blank time at the playhead, one SCROLL step per click (SCROLL at 1/4 → 4 clicks = 1 bar). Turn counter-clockwise to stage a removal instead
The overview previews the result while you stage: everything behind the splice point is drawn where it will end up — waveforms, MIDI, markers, loop and punch points. An insert shows the blank bars as a highlighted band, a removal shows the tail pulled up to a cut line at the splice point. The encoder label shows the amount, e.g. +1 bar / -2 beats
Push Encoder 5 to apply. A SPLICE 0%…100% overlay locks the controls while the tape is rewritten. It shows a time estimate and how much tape is being moved: everything behind the splice point has to be rewritten on every track, so the more tape follows the splice point, the longer it takes (a few seconds per minute of tail on 8 tracks)
Any button press discards the staged splice — PLAY included — and so does turning Encoder 1 (grid) or Encoder 8 (scroll), switching screens, changing the encoder mode, Undo/Redo, a live recording, or turning the amount back to 0. Only Encoder 5 itself and SHIFT leave it alone. Nothing on the tape changes until you push, and there is no audible preview: the drawing is the preview
The splice point is the playhead position at the first click. To splice somewhere else, scroll there (which discards the staged amount) and stage again
Markers move with the tape — locked markers and tempo/signature markers too, so the bar/beat readout behind the splice stays what it was. Markers inside a removed span are deleted; loop and punch points inside it collapse to the splice point
A removal is limited to 1:30 of tape per splice (the removed audio of all 8 tracks stays on the Undo stack, like a Cut). A removal that would swallow a tempo or signature marker is refused — move the playhead past it or remove the variation first
Audio automation: an insert opens a gap that plays at the fader value; a removal lets the neighbouring points interpolate across the seam. MIDI CC / pitch-bend / aftertouch set inside a removed span carry their last value over to the splice point
Undo reverts a splice completely — audio, automation, MIDI, and since v1.2.2 also the markers, loop and punch points — from either screen (UNDO SPLICE n%); Redo re-applies it
The same SPLICE encoder is on the MIDI Overview and does exactly the same thing from there
Reposition a marker without recreating it — its label, colour, lock, ▶ start flag, tempo / time signature change and MIDI event all travel with it. Made for adjusting section starts and pre-rolls after the fact (#315).
Select the SCROLL encoder mode and put the playhead on a marker (the one a Marker press would toggle — jump there with SHIFT + ← →). Encoder 3 reads MOVE <name>; it stays blank while the playhead is not on a marker
Turn Encoder 3 clockwise to stage a move later, counter-clockwise earlier, one SCROLL step per click (SCROLL at 1/4 → 4 clicks = 1 bar). The label shows the staged amount
The overview previews the result while you stage: the marker is drawn where it will land, its old place stays as a muted ghost, and MOVE <name> +2 beats - PUSH to apply sits next to it. The playhead rides along with the marker, so it never leaves the screen however far you carry it — set SCROLL to a bar for long trips. Turning back onto the original place clears the staged move and brings the playhead back with the marker
Push Encoder 3 to apply. The playhead stays on the marker at its new place, so you can nudge it again or press Play to hear the new section start right away
Any other input discards the staged move — a button press, turning another encoder, scrolling, switching screens or encoder modes, Undo / Redo, a live recording. The one exception is Encoder 1: changing the SCROLL step keeps the staged move, so you can travel in bars and land in sixteenths
The lock does not stop a move: like a SPLICE, a staged-and-pushed move is a deliberate edit, while the lock guards against accidental deletion. Tempo / signature and MIDI-event markers move too — moving a tempo marker moves the grid, MIDI and metronome behind it with it
Other markers are no obstacle while turning — moving past them reorders the sections. Landing exactly on another marker is settled at push, the way a LOOP Paste treats its destination: an unlocked marker there is replaced (Undo brings it back), a locked, tempo or MIDI-event marker refuses the push (locked marker there) and keeps the staged move, so one more click past it is all it takes. Nothing moves before the tape start
Undo puts the marker back (UNDO Marker Move); Redo moves it again. The playhead goes with it both ways, like every other Undo lands on what changed, so Encoder 3 keeps reading MOVE <name> and you can stage the next try straight away
Looking for room to paste or record without erasing anything? FREE BAR moves the playhead to the next empty bar, so you do not have to scroll for it (#323).
Touch and hold the track area (about a second) to open Quick Settings, then touch FREE BAR. The panel closes, the playhead jumps and FREE BAR / BAR 17 shows where it landed. The jump is immediate, stopped or playing
A bar is free when, from its bar line for one full bar, all 8 audio tracks stay below -40 dB and no MIDI note sounds on any MIDI track — a note held over from an earlier bar counts. Hiss and room tone under -40 dB count as empty, and so does the very end of a fade-out; MIDI CCs and automation are not looked at
Bars follow the grid you see: tempo and time signature changes on Markers are taken into account
Mutes and solos are ignored — a muted track’s material is still material, and the point is never to land on any
The target is the start of the next gap. If the playhead already stands in a free bar, the rest of that gap is skipped, so touching FREE BAR again walks from gap to gap instead of creeping one bar forward
Behind the last audio and the last MIDI note everything is free, so the last stop is always the first bar line after your material. From there on, TAPE IS FREE FROM HERE appears and nothing moves
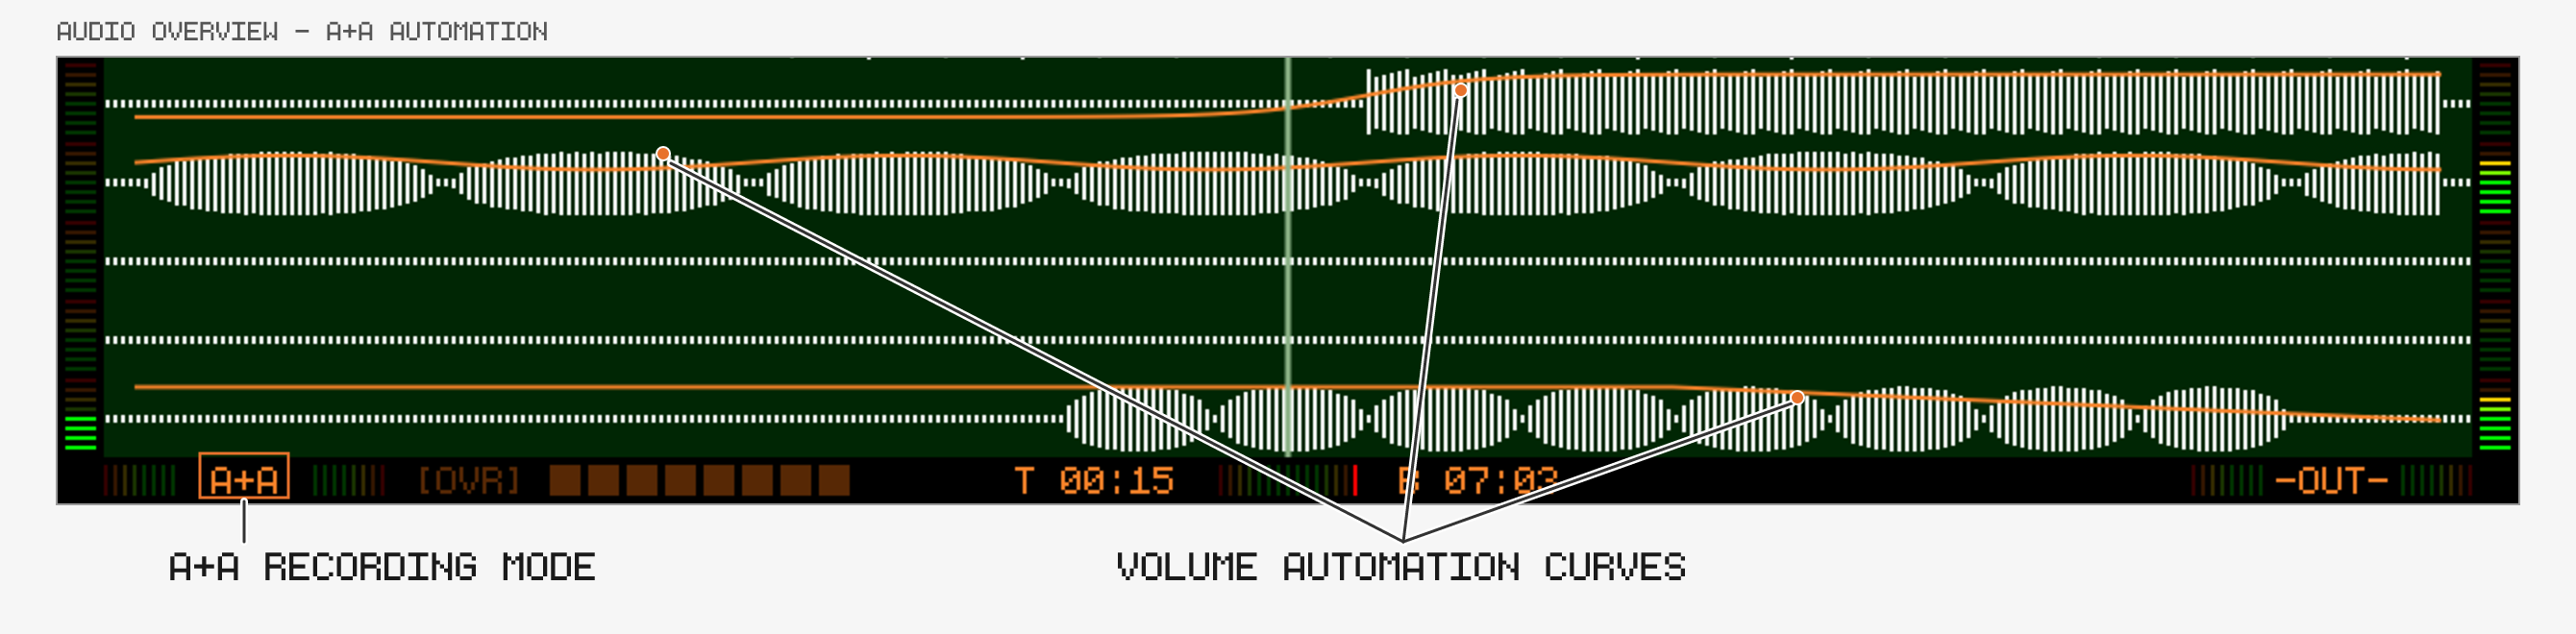
Touch the stereo input meter to cycle between three recording modes:
AUDIO: Default. Records audio only, no automation
A+A: Records audio and live automation
ATM: Records automation only, no audio
In A+A and ATM mode the overview draws automation lines for the currently selected encoder mode (Volume, Pan, Return Mix, Return Vol). While recording is running, turning a track’s encoder writes its moves into that track’s automation lane.
In ATM mode every track records — turning any track’s encoder writes into its lane, no track selection or arming needed; in A+A mode automation is only written for the tracks being recorded (new in v1.2.1)
A recorded automation pass undoes as a single step, however many tracks and parameters were ridden (new in v1.2.1)
The Track Mixer can arm an automation pass directly: pressing there switches to ATM automatically (new in v1.2.1)
Recording behavior:
Recording keeps running when switching views (except Settings / USB Browser)
A running recording is indicated by a red border around the screen edges; actions that would silently stop it show an error instead (new in v1.2.1)
Touch the overdub indicator to quickly toggle Overdub (since v1.1.4)
+ while recording stops playback, undoes the take and moves the playhead back to where the recording started — instant retake (new in v1.2.1)
Record multiple takes of the same section and pick the best one:
Tip — rehearse the punch: set AUDIO MON (or MIDI MON) to PUNCH in the Project Settings and the input is only audible while the playhead is inside the punch brackets — even with punch recording off. What you hear on a rehearsal pass is exactly what a recorded pass will sound like (new in v1.2.1).
Set a Punch In region (best inside a Loop region so the playhead cycles automatically)
Start playback — each pass through the punch region records a take; the take row appears at the bottom
Stop and press a Track Button to audition a take (you can also switch takes during playback)
To commit, select the take and exit Punch ( + )
Pressing while auditioning keeps the selected take and resumes recording more passes
Notes:
Works for non-Overdub audio recordings only
Up to 8 takes; take 9 overwrites take 1
+ Track Button still mutes, + Track Button still solos during a take session
Stitch the best pieces of several takes into one — the best word or phrase out of each vocal take:
After the passes, press to set a comp marker at the playhead. While a take session is live and you are listening (or the transport is stopped), the marker button sets comp markers instead of tape markers. Press it again near a comp marker to remove it; clears them all
The screen dims down to the take’s track and region and the tape markers hide. Comp markers split the region into sections, each labelled with the take it plays
Move the playhead into a section and press a Track Button: the take is picked for that section only. The take row highlights the take of the section under the playhead
Commit as usual — exit Punch ( + ), or to keep the comp and record more passes. The sections are stitched together with a short crossfade (10 ms) at every comp marker: what you hear while auditioning is exactly what lands on tape
Notes:
Comp markers belong to the take session: they are not saved with the project and go away when the session ends
Setting a comp marker starts the audition, just like pressing a take button: the next Play compares takes instead of recording another pass. records more passes; the markers stay, and every section starts out on the new take
Up to 31 comp markers (32 sections)
One Undo after committing still restores the audio from before the session
The level meters read peak in 8 bars of 6 dB each, counted from the red end of the scale. Quieter bars stay lit as the level rises, so the last lit bar is the reading. The per-track meters run bottom-to-top; the stereo -IN- and -OUT- meters run outwards from their label:
Touch and hold the track area (about a second) to open the Quick Settings panel — MKR LEG, MOD HI, BIG TIME, SHIFT HOLD, SHIFT NAV, TIMED JUMP, SHIFT PLAY, PASTE JMP, SCROLL SND, TAPE SND, OVERDUB and the FREE BAR locate, without leaving the overview; see Touch (since v1.2.2)
Touch the time / beat readout (anywhere from T 00:00 over the streaming indicator to B 01:01) to toggle BIG TIME — a big, translucent overlay on the left half of the screen, readable from across the room: the time / bar-beat readout plus the name of the marker the playhead is in, the next one, and a progress bar with a bars:beats countdown to it — name your markers after chords or song sections and read the changes while playing. The setting is global and shows on both overviews (since v1.2.2) — the same setting as BIG TIME on the Utility screen
Markers can be given textual labels (e.g. “Verse”, “Chorus”)
A label that starts with a number from 1 to 8 (1 Verse, 2. Chorus) makes the marker a locator: the Locate 1 … Locate 8 button actions of MIDI Remote Control jump straight to it from a pad controller (since v1.2.2)
Markers snap to 1/4 notes — use the Audio Edit view for finer cut/copy/paste work (since v1.1.4)
Touch marker to edit label
Everything in the marker edit screen — label, lock, start flag, colour, tempo / time signature and MIDI events — is written together when you press APPLY; the key lights up while something is pending, and EXIT discards all of it (before v1.2.2 the button read SET LABEL and the lock took effect immediately)
MOVE MARKER (Encoder 3 in SCROLL mode) repositions the marker under the playhead by SCROLL steps, with everything it carries (new in v1.2.2)
A SPLICE moves markers with the tape — locked and tempo markers included — and deletes the markers inside a removed span. Undo of the splice brings them back (new in v1.2.2)
In the marker edit screen you can:
Lock / Unlock marker - Locked markers are shown with an * and cannot be deleted — neither by clear all Markers () nor by pressing the Marker button next to them; a press near a locked marker shows MARKER LOCKED and changes nothing. Unlock the marker here first to delete it (since v1.1.2; true lock against the Marker button new in v1.2.2)
Make it the start marker — the “start from here” point for repeated takes: while a marker carries the flag, always locates to it, whatever SHIFT PLAY in Utility is set to (the setting shows START MKR meanwhile). Push Encoder 8 to switch the flag button from the lock to ▶ (START ON / START OFF), then turn Encoder 8 up for on, down for off — or touch the button to toggle it; push again to return to the lock (like every other push-cycled encoder: push picks the function, turn sets it). Only one marker can be the start marker — flagging another one moves the flag. The start marker shows a ▶ in its head; deleting it hands back to the setting (new in v1.2.2)
Change BPM and Time Signature at the marker position (since v1.1.3)
Applies to all content after the marker, or until the next marker with a tempo change
Also affects existing MIDI notes, MIDI Clock and the Metronome
Markers that change the tempo or time signature (or send MIDI events) are always considered locked — to delete one, switch that change off first
FIT — find the tempo of an off-grid recording (since v1.2.2): set a marker on a downbeat and another one a few downbeats later, then edit the first marker. Hold and the BPM slot turns into FIT 4 BARS = 97.3 BPM: turn Encoder 1 to say how many bars lie between the two markers (1–64; set the time signature on Encoders 2/3 first), push Encoder 1 to take that tempo — the tempo / time signature change switches on and the BPM keeps one decimal. APPLY writes it and moves the second marker onto the downbeat of bar N + 1, so it stays where you placed it by ear. The audio is not stretched; only the grid, MIDI, clock and metronome follow. Shows NO NEXT MKR on the last marker and OUT OF RANGE when the bar count gives a tempo outside 30–360 BPM
Send MIDI events to external gear when the playhead crosses the
marker (new in v1.2.1):
Encoder 4 picks what Encoders 5/6 edit: - (no MIDI event — turning
back to - clears it), TRANS or PROG. A marker sends one or the
other — setting one clears the other
TRANS — Encoder 5: --- / START / STOP. Sends MIDI Start or
Stop at the marker, e.g. to kick a drum machine’s pattern in at the
chorus or stop an external sequencer for a breakdown. Only while Track8
is MIDI Clock Master; independent of the TRANSPORT send setting.
With CLOCK on, the message is aligned to the next clock tick like
Track8’s own transport
PROG — Encoder 5: channel (CH 1…16, starts on the selected MIDI
track’s channel), Encoder 6: PROG 1…128 (turn below 1 → ---
removes the program change); push Encoder 6 to switch Encoder 6 to
BANK 1…128 (Bank Select MSB). One event per marker; use two markers
for two devices or for a program change plus a transport command
Program changes are caught up: on play start, locate and loop wrap
the latest program change at or before the playhead is re-sent per
channel, so a synth is in the right patch when you start mid-song.
Transport events fire only when the marker is actually crossed
Markers with MIDI events show an M on the marker head and count as
locked, like tempo / signature markers — set the event back to - to
delete the marker (since v1.2.2)
Colour-code the marker with Encoder 7 (COLOR) — turn to cycle
through the regular marker colour plus red, yellow, green, cyan, blue,
purple, pink and white; push to go back to the regular colour. The
COLOR label is drawn in the selected colour as a preview. The marker
head, its label background and its marker leg all follow, which makes
sections easy to tell apart when scrolling a long project (new in v1.2.1)
UTILITY → MKR LEG draws a vertical line under each marker for easier visual reference (since v1.1.4)
Press + together to snap the Loop region to the surrounding marker bounds; with held the Punch region is set instead (since v1.2.0)
Cut/Copy/Paste ( / / ) always effects the area between two Markers
Hold + Cut/Copy/Paste to arrange the current Loop region — all unmuted tracks, audio and MIDI, with the Markers inside the loop — see Arrange Audio, MIDI and Markers together with LOOP (since v1.2.2; in v1.2.1 this took the loop region of the selected track only)
Only unmuted tracks are included in Cut/Copy All Operations ( / )
A soloed track counts as the only unmuted one: solo a track and the multi-track Cut/Copy takes just that track, no matter how the other Mutes are set (since v1.2.2)- The Clipboard is kept in Memory, and will be cleared when shutting down the device
Touch the clipboard indicator to open the Audio Clipboard Modifier and process the clipboard content
Hold and press / / to run the operation on both the audio and the MIDI side at once, over the Loop region — and with the Markers inside it (since v1.2.2). Use it to move whole song sections — a verse, a chorus — without leaving half the arrangement behind: set the loop around the section, LOOP + Copy, move the playhead, LOOP + Paste, and it arrives with its Markers, tempo changes and MIDI events in place, nothing to re-enter by hand.
The Loop region is used on both sides — set it by hand, or snap it to the surrounding Marker bounds with + together. The loop on/off state is left as it was
Like / , only unmuted tracks are included — on the audio side and the MIDI side, each judged by its own mutes. To arrange a single track, mute the others — or solo it: a soloed track counts as the only unmuted one on its side (since v1.2.2)
Paste puts every copied track back on its own track — also when only a single track was copied. There is no bouncing here: the multi-track clipboard keeps its layout on both sides
Paste replaces the destination on both sides for the length of the copied loop: every copied track is written back — the audio is overwritten and the MIDI events in that span are cleared before the clipboard is written, so nothing of the old section bleeds into the new one. A track that was silent in the copied section comes out silent at the destination too, on the MIDI side as on the audio side (since v1.2.2); before, a MIDI track without events in the section left the destination’s events in place. Tracks that were muted at copy time are not part of the section and are left alone
To clear or copy one track over the loop region and leave the Markers alone — e.g. to remove a lead that runs through twenty chord Markers — take the loop into Region Editing: Audio Edit, Track Button 7, push SLIDE (Encoder 4), Cut (since v1.2.2)
Mute every track, audio and MIDI, and LOOP + Copy/Paste moves just the Markers of a section — Undo takes them back like any other LOOP Paste (since v1.2.2)
Both clipboards are used, so LOOP + Cut/Copy replaces whatever was in them
Keep held to chain operations: Copy, move the playhead, Paste, all in one grip
Each action confirms on screen: Copy Loop: Audio + MIDI + Markers, Cut Loop: Audio + MIDI + Markers, Paste Audio + MIDI + Markers. When Mutes leave audio tracks out of the section, the overlay counts what is actually taken — Copy Loop: 7/8 Tracks + MIDI + Markers, or No Audio (muted) when every audio track is muted — so a track skipped as muted shows up right at the Copy, not later as a hole in the Paste
The Markers inside the loop travel with the section. A Marker region can never contain Markers (it ends at the next one); a loop can span as many as you like
Cut/Copy stores every Marker inside the loop — label, colour, lock, tempo / time signature change, MIDI events — with its distance to the loop start in real time, so a tempo change inside the section still lines up with the pasted audio
A Marker sitting exactly on the loop end bracket counts as part of the section and travels too. Pasting puts it right on the destination’s end bracket — unless a Marker already sits there, which keeps its place. Cut never deletes it: a Marker on the end bracket just as much marks the start of the section behind the loop, which a Cut leaves untouched (since v1.2.2)
Paste replaces the unlocked Markers in the destination span, the same way it replaces the audio and MIDI there. Locked Markers and Markers with a tempo / signature change or a MIDI event stay put — a paste is no way around the lock; a pasted Marker that would land exactly on one of them is skipped
Cut removes the unlocked Markers inside the loop; locked ones stay. Markers behind the loop are not moved (Cut clears the region, it does not close the gap — use SPLICE for that)
The ▶ start flag is never copied — there is only one start marker per project and it stays where it is
Only LOOP + Cut/Copy fills the Marker clipboard; every other Cut/Copy and a sample import replace it, so a later LOOP + Paste never pairs fresh audio with another section’s Markers
One Undo reverts both halves. After a LOOP Cut or Paste, a plain Undo (Record) takes the audio and the MIDI side back — Markers included — from either screen, and shows UNDO Audio + MIDI. Redo (push Encoder 8) restores both the same way (since v1.2.1)
This holds as long as the LOOP edit is the newest thing on both sides. Edit one domain on its own afterwards and Undo stays per-domain: on that domain’s screen it reverts the newer edit first — the LOOP edit underneath is only covered up, not lost: undo that edit and the following Undo pairs both domains again. On the other screen it reverts that side’s half on its own, and from then on the two halves are undone and redone independently
It also holds for a section without MIDI events, or without audio: both sides keep an entry for every LOOP Paste, even one that had nothing to write on that side (shown as UNDO Loop Paste when undone on its own) (since v1.2.2)
Once the two halves have come apart, the Markers go back with whichever half is undone first, and return with whichever half is redone first (since v1.2.2)
v1.2.1 introduced this as + Cut/Copy/Paste over the Marker region, next to a single-track LOOP + Cut/Copy. Both are replaced by LOOP + Cut/Copy/Paste: the Marker region can never carry Markers, and the two-button chord was awkward to hold. Plain Cut/Copy/Paste still works between Markers, per track and per domain
The clipboard can hold 12 minutes of audio in total (since v1.2.1). This has the following implications on the Workflow:
At most 12 minutes of audio can be Cut/Copied
If you Cut/Copy Multiple tracks, the sum can’t be greater than 12 minutes
Cut/Copy 8 tracks → The area can be 1.5 minutes long
Workflow helpers:
UTILITY → PASTE JMP: when enabled, Paste moves the playhead to the end of the pasted region, so you can quickly fill the tape with a repeating pattern (since v1.2.0)
UTILITY → MOD HI: highlights all modified (pasted/cut) areas in orange until the next clipboard operation or view switch (since v1.1.4)
During multi-take recording nothing is highlighted while the takes are still open — a pass stopped half way no longer leaves its span painted through take switching and comping. The kept take is highlighted once the session ends with punch off (since v1.2.2)
UTILITY → MKR LEG: marker legs stop at the track area, like the waveform, so the input/output meters and I/O indicators stay clear of them (since v1.2.2)
Every Cut/Copy/Paste confirms with a short overlay, e.g. COPY / Copy all tracks to Clipboard or PASTE / Paste to Track 3: Drums. For long operations the overlay stays up and locks the controls until the audio is safely written to disk, then lingers a moment as the same confirmation (new in v1.2.1)
The bounce confirmation (Bounce 7 Tracks to Track 1) counts the tracks the Clipboard actually holds — what the mixdown really mixes — not the tracks currently unmuted in the Mixer (since v1.2.2; before, muting or unmuting between Copy and Paste made the count wrong)
For Audio there is an Undo Stack of 12 minutes (since v1.2.1).
Every audio operation (record, cut, paste, nudge, automation edit) moves the previous audio on the Undo stack
As the Stack is capped at 12 minutes, older Undo steps get discarded
As the Undo Stack has the same size as the Cut/Copy Limit, you can always undo once
Undo moves the playhead to the start of the undone region (new in v1.2.1)
Undo and Redo confirm what they touched with a short overlay, e.g. UNDO Track 3: Drums, UNDO all tracks, REDO Automation (new in v1.2.1)
In two low-memory situations the device frees history early — always with an on-screen message: CLIPBOARD CLEARED and UNDO HISTORY TRIMMED (new in v1.2.1)
Open Audio Edit with + . The view opens on the parameter you last adjusted with an encoder anywhere in the audio views — turn a control, then jump straight to editing its automation (new in v1.2.1).
Scroll resolution — push to switch between Grid and ms steps. In Grid mode the beat ruler shows sub-beat grid steps as shorter ticks; in ms mode only beats and bars are drawn (since v1.2.2)
4
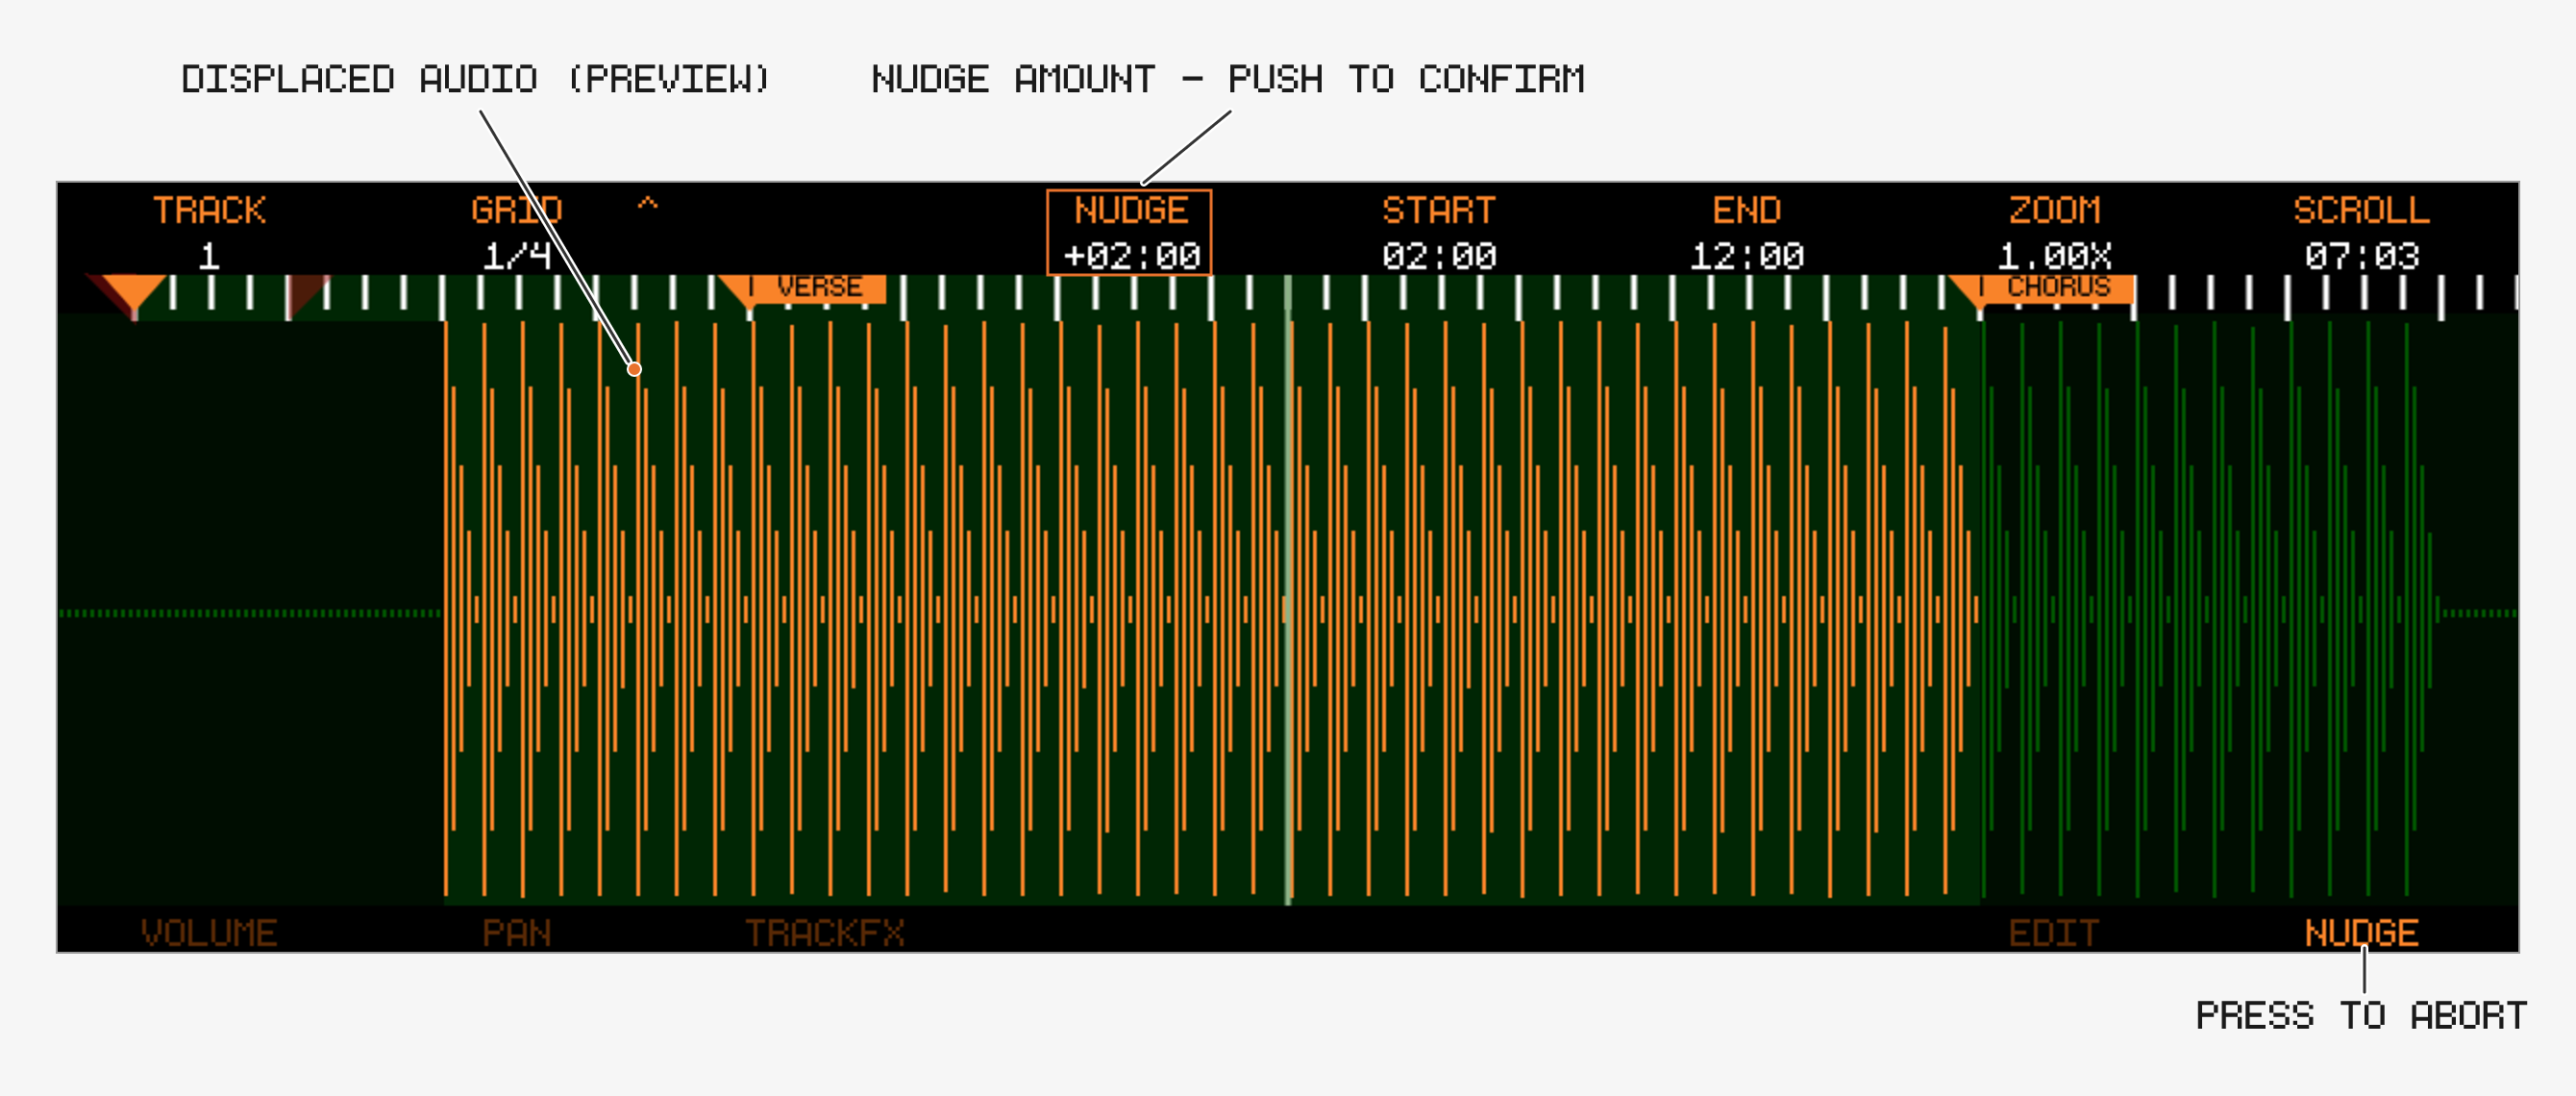
Value / automation at playhead (see below) — push starts an LFO on the lane; SLIDE in Edit mode (push: selection = Loop region), Nudge in Nudge mode (push: confirm)
5
Start of Edit/Nudge region — push to set Start to playhead (since v1.1.2)
6
End of Edit/Nudge region — push to set End to playhead. Selects the FX parameter in TrackFX/Return mode
7
Zoom (0.25x → 2048x)
8
Scroll timeline — push to move the Edit/Nudge region to the playhead
Push Encoder 4 on any automation lane (Volume, Pan, TrackFX, Return) to generate a tempo-synced LFO into the region between the surrounding Markers. The LFO is written into the lane while you dial it in, so you see it in the lane and hear it during playback right away.
Encoder
Turn
Push
4
LFO shape: SINE, TRI, SAW DN, SAW UP, SQUARE, S&H
Commit and leave LFO mode
5
RATE — one cycle per note value, same ladder as GRID (up to 4 whole notes); starts at the current GRID
Shift the phase by 90°
6
DEPTH 0–100 %, or DELTA -100 to +100 % after a push ( = 1 % steps)
Toggle Encoder 6 between DEPTH and DELTA
The lane’s value at the region start is the LFO’s resting level; set it with Encoder 4 before pushing, or shift it afterwards with DELTA, which moves the whole LFO up or down by up to half the lane’s range
Volume and Return Level dip down from that level (100 % reaches silence), every other lane swings around it, TrackFX frequencies, Q and times in octaves rather than Hz
Every shape except SAW UP starts at the resting level, so a volume LFO begins at full level; SAW UP swells up from the trough. On the lanes that swing around the resting level (Pan, TrackFX, Return Mix) every shape with a centre crossing starts there: SINE, TRI and SAW UP rise first, SAW DN falls first; SQUARE and S&H begin at the top
Automation that was in the region is replaced; automation outside it is untouched, and the lane returns to the resting level at the region end. The region is its own section of the lane: automation before or after it is not connected to the LFO — between them the lane reads the fader, exactly as after clearing a region between markers (since v1.2.2)
Anything other than turning the LFO encoders commits the LFO: moving the playhead, Play, touching the lane, zooming, changing the track or lane, leaving the screen, and UNDO itself (which then undoes the LFO)
Selectively delete automation points with + touchscreen — this simplifies the curve without creating holes
Clear automation between the surrounding Markers with + the Track Button of the selected mode (new in v1.2.1 — previously this cleared the whole lane):
Volume: + Track Button 1
Pan: + Track Button 2
TrackFX: + Track Button 3 — only clears the currently selected TrackFX parameter
Return: + Track Button 4 — only clears the currently selected Return parameter
With no markers set, the clear extends over the whole tape
The cleared region becomes a hole: it reads the track’s base value
SLIDE (Encoder 4): moves Start and End together in GRID / JUMP increments, keeping the region length (new in v1.2.1)
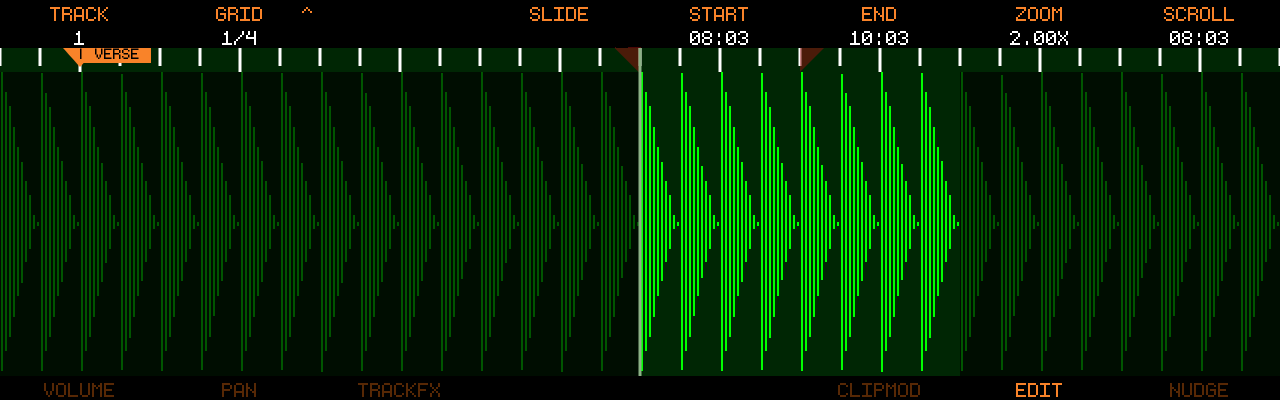
Selection = Loop (since v1.2.2): push SLIDE (Encoder 4) to set START / END to the current Loop region — SELECTION = LOOP confirms it, and the playhead jumps to the new START so the selection is on screen (not while recording). Use it to edit one track over a long stretch without touching the Markers: set the loop around the part on the overview (it can span as many Markers as you like), open Audio Edit, Track Button 7, push SLIDE, Cut. Unlike LOOP + Cut on the overview, only the selected track is cleared and every Marker stays where it is. With no loop set the push shows NO LOOP REGION and changes nothing; the loop on/off state does not matter
Selection off (since v1.2.2): press Track Button 7 again while in Region Editing to switch the selection off — the track draws all bright inside the usual EDIT frame, START / END read -, playback runs past the End and + Play is the plain transport jump again, so you can review an edit in context without leaving the view. The region is kept: turning START, END or SLIDE brings it back exactly as it was (the first click only restores it), pushing START / END brings it back with that end on the playhead, and pressing Track Button 7 once more toggles it on. Cut / Copy show NO SELECTION while it is off. Entering Region Editing or the screen always starts with the selection on
+ moves the playhead to the Start of the selection; playback stops at the End unless LOOP is enabled or the selection is switched off (since v1.2.0)
Modification highlights (UTILITY → MOD HI) are also shown in this view (since v1.1.5)
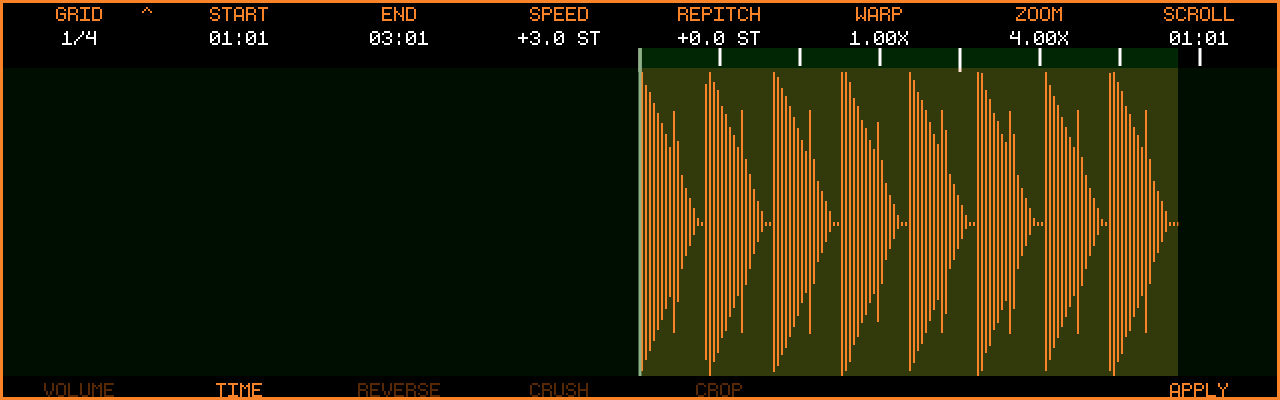
The Clipboard Modifier (introduced in v1.1.3) is a small self-contained editor that works on the audio clipboard instead of the tape. Copy audio, mangle it, audition it, then paste the result — the tape stays untouched until you paste.
The screen is marked with an orange border so it can’t be confused with the regular Audio Edit view.
Enter by touching the clipboard indicator on the Audio Overview or Audio Edit screen after a Cut/Copy
Or from Audio Edit: Track Button 6 CLIPMOD opens the modifier; + Track Button 6 COPY > CLIP copies the current selection and opens the modifier in one step (since v1.1.5)
Multi-track clipboards open with all copied tracks included — every edit is applied to all of them
Exit via any view button (e.g. or )
The modifier remembers the page and group you last worked in and reopens there (new in v1.2.1, pages (since v1.2.2)); all parameters start neutral on each visit
It also remembers the encoder 1 resolution — the GRID division, or JUMP mode and its millisecond step — so switching to the overview or wave edit screen and back no longer resets it to 1/4 (new in v1.2.1)
Important
Clipboard edits have no undo. If you don’t like a result, Copy the audio again for a fresh clipboard.
Hold and the first three encoders become the tuning settings that the SPRAY and RESO groups read. They are settings, not edits: they persist like GRID, have no APPLY, and turning them never discards a group’s un-applied changes. The pushes keep their normal jobs.
The groups are organised in pages (since v1.2.2). + Track Button 1–7 selects a page, Track Buttons 1–7 select a group on the current page, and Track Button 8 stays APPLY. While is held the track-button row shows the page names (the current page lit, the others muted, undefined pages blank); release it and the row shows the current page’s groups again. The current page is always shown at the top left of the waveform area, below GRID, as [EDIT], [GRAIN], [MOD] or [FX].
Each group puts its parameters on Encoders 4/5/6. Switching page or group (or re-pressing the current group) discards any un-applied settings of the current group.
+ Button
Page
Contents
1
EDIT
the original modifier: VOLUME … FILTER (CRUSH moved to DIST)
2
GRAIN
rhythmic granular resynthesis and a tuned resonator
3
MOD
LFOs printed over the region
4
FX
printed delay / reverb, loop tools
5
DIST
crush, colour, tape, amp, wavefolder, ring modulator
PAN: a balance on the clip’s existing stereo pair — panning right attenuates the left channel and leaves the right untouched (and vice versa). A clip recorded into one input only lives on one side, so panning it towards the silent side fades it out rather than moving it across.
FADE: negative values = fade-in, positive = fade-out. Values up to ±100 use an equal-power curve; beyond ±100 the curve gets steeper, up to ±200 (since v1.2.0)
SHUFFLE / STUTTER (since v1.2.2): while un-applied, the divisions are drawn over the waveform — thin lines with the source slice number for each SHUFFLE slice, dashed lines at each STUTTER repeat. Lines that would sit closer than a few pixels are left out; zoom in to see them
SPEED / WARP respect the 12-minute clipboard limit across all copied tracks combined — the encoder simply stops at the last value that still fits (new in v1.2.1)
Automation copied along with the clip follows a length change: after an APPLY that resizes the clip (SPEED, WARP, CROP), pasting places the automation over the new length rather than the original one
CROP needs no parameters: set START/END (or SLIDE the region), then APPLY to discard everything outside it (since v1.2.0)
PITCH bends the pitch smoothly from FROM at the region’s Start to TO at its End without changing the length (the same engine as REPITCH). A bend that resolves to the original pitch is TO = 0; one that drifts away is FROM = 0; FROM = TO is a static repitch. CURVE shapes the ramp: LIN is a straight line, positive values start slow and finish fast, negative values start fast and finish slow. Hold for 0.1 st steps
FILTER runs one filter node over the region and sweeps its cutoff from START to END (interpolated in octaves, so a sweep sounds even across the spectrum). START = END gives a static filter. The cutoff encoders step in thirds of an octave ( = a twelfth); push Encoder 6 to cycle the type LP → HP → BP. A low-pass with both ends at 20 kHz, or a high-pass with both at 20 Hz, is “open” and does nothing; cycling the type moves any open cutoff to the new type’s open end (1 kHz for BP, which has no open position)
A static setting in one press: pushing FROM / START copies the other end’s value onto it, pushing TO / END does the reverse — so dial a sweep, then push the end you want to keep and the whole region gets that value
While a PITCH or FILTER setting is un-applied, the sweep is traced as a line over the waveform (0 st on the centre line for PITCH; 20 Hz at the bottom to 20 kHz at the top for FILTER)
On a multi-track clipboard, APPLY shows its progress per track (“Track 3/8”) (new in v1.2.1)
Rhythmic granular resynthesis: the region is re-read as a stream of short grains on the musical grid.
Button
Group
Encoder 4
Encoder 5
Encoder 6
1
GRAIN
SIZE (grain length, note value 1/1–1/64)
RATE (grain onset interval, note value)
CONTOUR (-100 ramp down · SINE · +100 ramp up), push to toggle FOLLOW / HOLD
2
SPRAY (grains follow GRID)
POSITION (0–100 %, read-position scatter), push to re-roll
PITCH (0–100 %, chance of a scale-degree transposition)
REVERSE (0–100 %, chance of a backwards grain)
3
RESO
SLOPE (LP -100 · BP · HP +100)
DECAY (0–100, ring time)
MIX (0–100 %)
Notes:
GRAIN and SPRAY engage on the first encoder turn (there is no neutral grain setting); re-pressing the group button disarms them. With RATE shorter than SIZE the grains overlap into a dense texture, with RATE longer than SIZE they gate the region rhythmically. FOLLOW reads each grain where it sounds, so the arrangement is kept but re-articulated; HOLD reads every grain from the region start, freezing that instant into a sustained texture
SPRAY runs the same scheduler with grains one GRID step long, back to back (or one JUMP step in JUMP mode), and adds randomness per grain; change GRID on Encoder 1 to change the grain size. Transpositions are drawn from the SCALE / SPAN tuning settings, relative to the grain’s own pitch. The random pattern is fixed by a seed, so what you audition is what APPLY prints; push Encoder 4 for a new roll
While GRAIN or SPRAY is un-applied the grains are drawn over the waveform as window-shaped outlines on a dark backing, so they read over a waveform of the same colour: their width is SIZE, their spacing RATE, their shape CONTOUR. A transposed grain sits higher or lower (0 st on the centre line, like the PITCH line), a reversed grain shows its contour mirrored, and when a grain reads from somewhere other than where it sounds (POSITION, HOLD) a thin line leads to its read position at the bottom of the waveform
RESO is a bank of resonant filters tuned to the notes of SCALE across SPAN octaves above ROOT (at most 24 bands). The root sits in the centre and the following bands alternate left and right, so a chord spreads across the stereo field; the wet signal is lifted with DECAY and soft-clipped, so a narrow, long-ringing band comes out loud rather than thin. While un-applied the bank’s frequency response is drawn as a graph in a dark strip along the bottom of the waveform: one peak per band on a log frequency axis that spans the bank with an octave to spare on each side, DECAY narrowing the peaks, SLOPE growing a shelf on the side each band lets through, the root band’s note name under its peak (every band’s while there are few). The graph sits over the region while the region is wide enough, else across the whole screen. Fed a drum loop it produces a pitched, plucked version of the groove; fed a pad it rings as a chord. SLOPE morphs every band from low-pass through band-pass to high-pass, DECAY sets how long the bands ring. The ring-out continues past END into the rest of the clip (up to 6 s) and is cut at the clip end
One LFO per group, printed over the region. All four share the same encoder layout.
Button
Group
Encoder 4
Encoder 5
Encoder 6
1
VOL LFO (tremolo)
RATE (note value 1/1–1/64)
DEPTH (0–100 %)
SHAPE (SINE, TRI, SAW DN, SAW UP, SQUARE, S&H), push to advance the phase by 90°
2
PAN LFO (auto-pan)
RATE
DEPTH
SHAPE
3
PITCH LFO (vibrato, ±12 st at 100 %)
RATE
DEPTH
SHAPE
4
FILT LFO (auto-wah)
RATE
DEPTH (-100 to 100 %): positive closes a low-pass from 20 kHz by up to 8 octaves, negative opens a high-pass from 20 Hz by up to 8 octaves
SHAPE
Notes:
DEPTH 0 is neutral. Every shape starts unmodulated at the region’s Start: on VOL LFO and FILT LFO the wave dips from the top (SAW UP is the one swell that starts at the bottom); on PAN LFO and PITCH LFO it starts at the centre, SINE / TRI / SAW UP moving right / up first and SAW DN left / down first (SQUARE and S&H have no centre to start from and begin at the top). Pushing SHAPE advances the phase by 90°, so on PAN / PITCH one push starts at the peak, two at the centre falling, three at the trough. While a setting is un-applied the LFO is traced over the waveform at its actual DEPTH: VOL LFO as the gain from the top, PAN LFO and PITCH LFO around the centre line, FILT LFO as the cutoff on the filter scale (low-pass dipping from the top, high-pass rising from the bottom)
FILT LFO shows LP or HP in front of its DEPTH value so the sign is readable at a glance
A SQUARE on VOL LFO at 1/8 is a trance gate, a SAW DN at 1/4 a pump, S&H on PITCH LFO a random pitch pattern
DELAY / PINGPONG / REVERB are printed into the clip: inside the region MIX crossfades the dry signal with the effect, and the tail keeps running past END on top of the rest of the clip (up to 6 s, cut at the clip end). A printed tail can be reversed, granulated or resonated afterwards. The delay time is capped at 2 s
While un-applied, DELAY / PINGPONG mark each repeat above the waveform (fading with FEEDBACK; PINGPONG alternates top and bottom for left and right) and REVERB draws its decay envelope over the region: as tall as MIX at START, falling away over the tail’s length
ROTATE turns the region cyclically by grid steps (or JUMP steps in JUMP mode) so another beat lands on its start. XFADE smooths the loop seam: it blends the audio that follows END into the region’s start (or, when END is the clip end, the audio before START into the region’s end; with neither available it fades both ends). LAYER stacks the region onto itself every grid step, wrapping around the region, with a decaying level — a circular canon. While un-applied the waveform shows the result of all three tools (turned, seamed and stacked, exactly as APPLY will print it); a dashed line marks the ROTATE seam, XFADE draws its crossfade curves over the seam span, and LAYER marks each tap with a fading marker
Everything that bends the waveform itself. CRUSH (from the EDIT page) and COLOR (from the FX page) live here now.
Button
Group
Encoder 4
Encoder 5
Encoder 6
1
CRUSH
BIT (32 down to 1 bit)
SAMPLE (1x–32x rate reduction)
—
2
COLOR
DRIVE (0–100, tape saturation)
TILT (-100 drive the lows … +100 drive the highs)
COMP (0–100, one-knob compression), push to cycle the TILT crossover LOW (80 Hz) / MID (650 Hz) / HIGH (2.5 kHz)
3
TAPE
DRIVE (0–100)
DENSITY (0–100)
MIX (0–100 %)
4
AMP
GAIN (0–100, up to +30 dB), push to cycle the model CLEAN / CRUNCH / FUZZ / METAL
TONE (-100 dark … +100 bright)
CAB (0–100, speaker low-pass)
5
FOLD
FOLD (0–100)
SYMMETRY (-100 … +100)
SMOOTH (0 triangle … 100 sine)
6
RING
FREQ (20 Hz–2 kHz)
MIX (0–100 %)
WAVE (SINE / SQUARE / TRI)
Notes:
TAPE is the mastering tape saturator from the Master FX, printed into the clip, but let off the leash: DRIVE also pushes up to 12 dB of extra gain into the tape and above 50 blends in a second saturation pass, so DRIVE 100 is a fuzz rather than a polish. DENSITY is the tape’s thickness control, MIX blends the saturated signal with the dry one
AMP is a small amp chain: TONE shapes the sound before the stages (negative closes a low-pass, positive lifts the presence), GAIN drives the stages, CAB closes a 12 dB/octave speaker low-pass from fully open to 2.5 kHz. CLEAN is one soft stage, CRUNCH two asymmetric stages with a coupling filter between them, FUZZ a biased hard clip into a soft stage, METAL a tight high-pass into two hard stages with the mids scooped
FOLD is a wavefolder: FOLD drives the signal into the folder (up to 16x), SYMMETRY offsets it so even harmonics appear, SMOOTH morphs the folds from triangle (buzzy) to sine (round)
AMP and FOLD hold the level: their output is matched to the input’s envelope, so GAIN and FOLD add harmonics rather than volume and the result pastes back onto the tape at the level it was copied
RING multiplies the region with a carrier at FREQ: low carriers tremble, higher ones produce the metallic sidebands ring modulation is known for. FREQ steps in thirds of an octave ( = a twelfth). The carrier is locked to the region’s Start, so audition and APPLY sound the same
While a TAPE, AMP, FOLD or RING setting is un-applied the waveform shows the distorted result
plays the clipboard (not the tape), including all pending, un-applied settings — tweak while it plays
jumps the playhead to START without toggling playback (a running audition restarts from there). Pressed again while the playhead sits on START — or has just restarted from it — it jumps to the start of the clip, so two presses review the whole clip after editing a section (since v1.2.2)
/ move the playhead by the GRID / JUMP step
toggles looped playback
/ set the loop points to the playhead
Press + together to snap the loop to the current START/END region (new in v1.2.1)
Looped audition dips briefly (about 5 ms each side) through the loop point so the wrap never clicks; this is audition only — APPLY and the paste use the region exactly as it is (since v1.2.2)
Tape playback is silenced while the modifier is open; it resumes when you leave the screen
Track8 aims to make MIDI routing as simple as possible. Instead of listing all connected MIDI devices Track8 introduces a Track to MIDI Channel mapping.
Each track = one MIDI output channel
MIDI input → always routed to active track
It does not matter on which MIDI Channel incoming notes/CCs are
Channel Information of incoming MIDI signals is discarded and always routed to the selected Track
Devices flagged as control surface in UTILITY → MIDI → DEVICE are the exception: their CCs drive MIDI Remote Control instead of being recorded (since v1.1.4).
Encoder 8 scrolls the timeline, Encoder 1 changes the scroll increment
Encoder 3 is MOVE MARKER: with the playhead on a marker, turn to stage a move by SCROLL steps, push to apply — the same as on the Audio Overview (new in v1.2.2)
While SCROLL is active, the beat ruler shows the scroll increment as shorter ticks between the beats, like the grid in MIDI Edit (since v1.2.2)
Encoder 7 zooms the timeline, 0.25x to 4x around the playhead (since v1.2.2). The zoom is remembered per overview (Audio and MIDI zoom independently) and resets to 1x on startup
A mouse scroll wheel (USB) also scrolls the timeline (since v1.1.1)
Encoder 5 → SPLICE: insert or remove time at the playhead (new in v1.2.2)
Turn clockwise to stage blank time, one SCROLL step per click; counter-clockwise to stage a removal. The overview previews the result — notes, markers and loop/punch points are drawn where they will end up, an insert shows the blank as a band, a removal a cut line — and the encoder label shows the amount (+1 bar, -2 beats)
Push Encoder 5 to apply. Any button press (PLAY included), Encoder 1 or Encoder 8, switching screens or the encoder mode discards the staged splice — only Encoder 5 itself and SHIFT leave it alone. Nothing changes until you push; the drawing is the preview
It is the same operation as on the Audio Overview: everything behind the splice point moves — all MIDI tracks (notes, CC, pitch-bend, aftertouch), all audio tracks with their automation, and the markers, loop and punch points. CC / pitch-bend / aftertouch set inside a removed span carry their last value over to the splice point
Removals are limited to 1:30 per splice and refused over a tempo or signature marker; see the Audio Overview page for the full rules
Per-track MIDI record offset, 0 to -50 ms — the MIDI counterpart of the audio REC OFFSET
Recorded notes and CCs are stored this much earlier than they arrive. Use it when your takes land late on the grid: what you hear while recording (metronome, tracks) reaches your monitors after the audio output latency, so notes played in time with it arrive that much late
Start with roughly your audio buffer latency and adjust by ear; it applies to live recording only (not step record)
Turn left to increase (shifts earlier), like the audio REC OFFSET
Record quantize: while enabled, incoming MIDI notes are snapped to the grid as they are recorded.
Encoder 6: quantize grid, 1/4 to 1/64 — push to toggle triplets (e.g. 1/16T), like the grid encoder in MIDI Edit
Encoder 7: enable/disable record quantize
Encoder 8: strength, 0% to 100% — 100% puts notes exactly on the grid, lower values move them only part of the way, keeping some of the human feel
The note start is quantized to the nearest grid line; the note keeps exactly the length you played
Applies to notes as they are stored, on all further takes until switched off — already recorded notes are untouched (quantize those with the EDIT tool in MIDI Edit)
Step recording is unaffected: it always snaps to the step grid
Touch and hold the track area (about a second) to open the Quick Settings panel with the everyday Utility toggles (MKR LEG, MOD HI, BIG TIME, SHIFT HOLD, SHIFT NAV, TIMED JUMP, SHIFT PLAY, PASTE JMP, SCROLL SND, TAPE SND, OVERDUB) and the FREE BAR locate, which jumps to the next bar that is empty on all audio and MIDI tracks; see Touch (since v1.2.2)
Touch the time / beat readout at the bottom of the screen to toggle BIG TIME, the big translucent overlay on the left half of the screen with the time / bar-beat readout and the current / next marker names with a countdown — the same toggle as on the Audio Overview (since v1.2.2)
The indicator highlights the origin Track of the clipboard content
Cut/Copy always adheres to the regions defined by Markers
Hold + Cut/Copy/Paste to arrange the current Loop region — all unmuted tracks, audio and MIDI, with the Markers inside the loop — exactly like on the Audio Overview, see Arrange Audio, MIDI and Markers together with LOOP (since v1.2.2)
+ Cut/Copy includes all unmuted tracks — a soloed track counts as the only unmuted one (since v1.2.2)
Paste always goes to the Playhead position on the selected track and — like audio — replaces what is there for the length of the clipboard (notes, controllers, pitchbend, aftertouch); it does not merge onto existing events (since v1.2.1, before that Paste merged)
+ Cut/Copy/Paste runs the operation on the MIDI and the audio side at once, over the Loop region and with the Markers inside it, for arranging the whole song — see Arrange Audio, MIDI and Markers together with LOOP (since v1.2.2); in v1.2.1 this was + + Cut/Copy/Paste over the Marker region
Each action confirms on screen: Copy Loop: Audio + MIDI + Markers, Cut Loop: Audio + MIDI + Markers, Paste Audio + MIDI + Markers. When Mutes leave audio tracks out of the section, the overlay counts what is actually taken — Copy Loop: 7/8 Tracks + MIDI + Markers, or No Audio (muted) when every audio track is muted
LOOP + Paste writes back every copied MIDI track: one that was silent in the copied section clears its destination span, like the audio side pastes silence there; tracks muted at copy time are left alone (since v1.2.2)
After such a LOOP Cut/Paste, + Record undoes the MIDI and the audio half in one press (UNDO Audio + MIDI), Markers included, and + push Encoder 8 redoes both (since v1.2.1)
Both confirm what they touched with a short overlay, e.g. UNDO Track 2: Bass or REDO all tracks (new in v1.2.1)
A SPLICE is undone as a whole: one Undo reverts the MIDI and the audio side, from either screen (markers keep their post-splice positions) (new in v1.2.2)
Incoming MIDI notes can trigger threshold recording. For this you have to be in one of the MIDI views, or A && M recording has to be enabled in the Project Settings.
Incoming MIDI is echoed to the output channel of the selected track. This can now be switched off independently of the audio monitor:
In the Project Settings, push Encoder 8 to cycle between AUDIO MON and MIDI MON, then turn to set OFF/ON/PUNCH
PUNCH echoes input only while the playhead is inside the punch brackets — whether or not punch recording is armed — so a rehearsal pass sounds exactly like the recorded result (new in v1.2.1)
Defaults to ON
Note-off messages always pass, so no notes get stuck
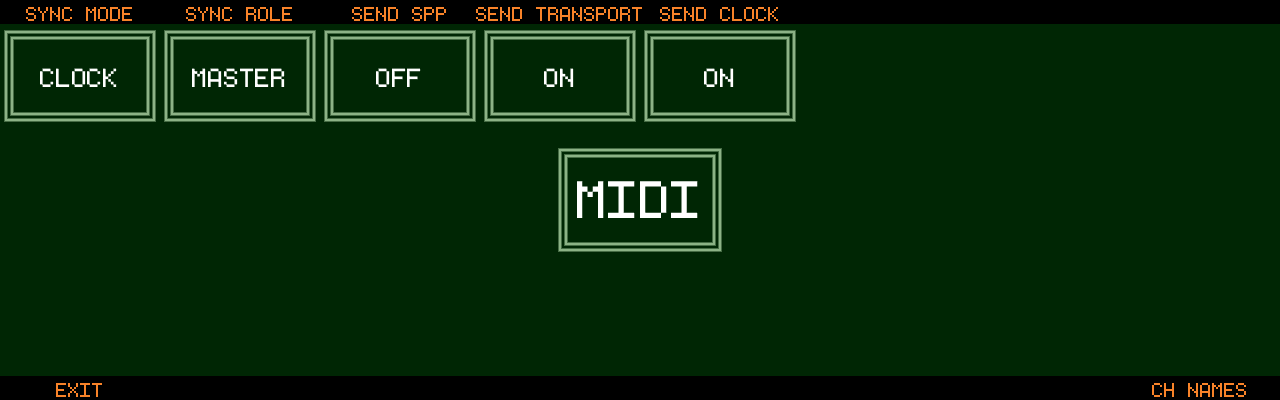
Clock and MTC sync are configured in UTILITY → MIDI (see Utility):
SYNC MODE: CLOCK or MTC
SYNC ROLE: MASTER or SLAVE
Clock mode: send/receive SPP, Transport and Clock individually
MTC mode: frame rate (24/25/29.97/30 fps) and, as slave, an MTC offset
Clock sync has been hardened over several releases (tighter DIN clock since v1.1.1, larger averaging and outlier detection for slave sync, further MIDI scheduling and jitter improvements new in v1.2.1).
The DEVICE, CONTROL and CH NAMES buttons on this screen configure MIDI Remote Control, channel names and MIDI Device Profiles (per-channel note/CC names for drum machines and synths, since v1.2.1).
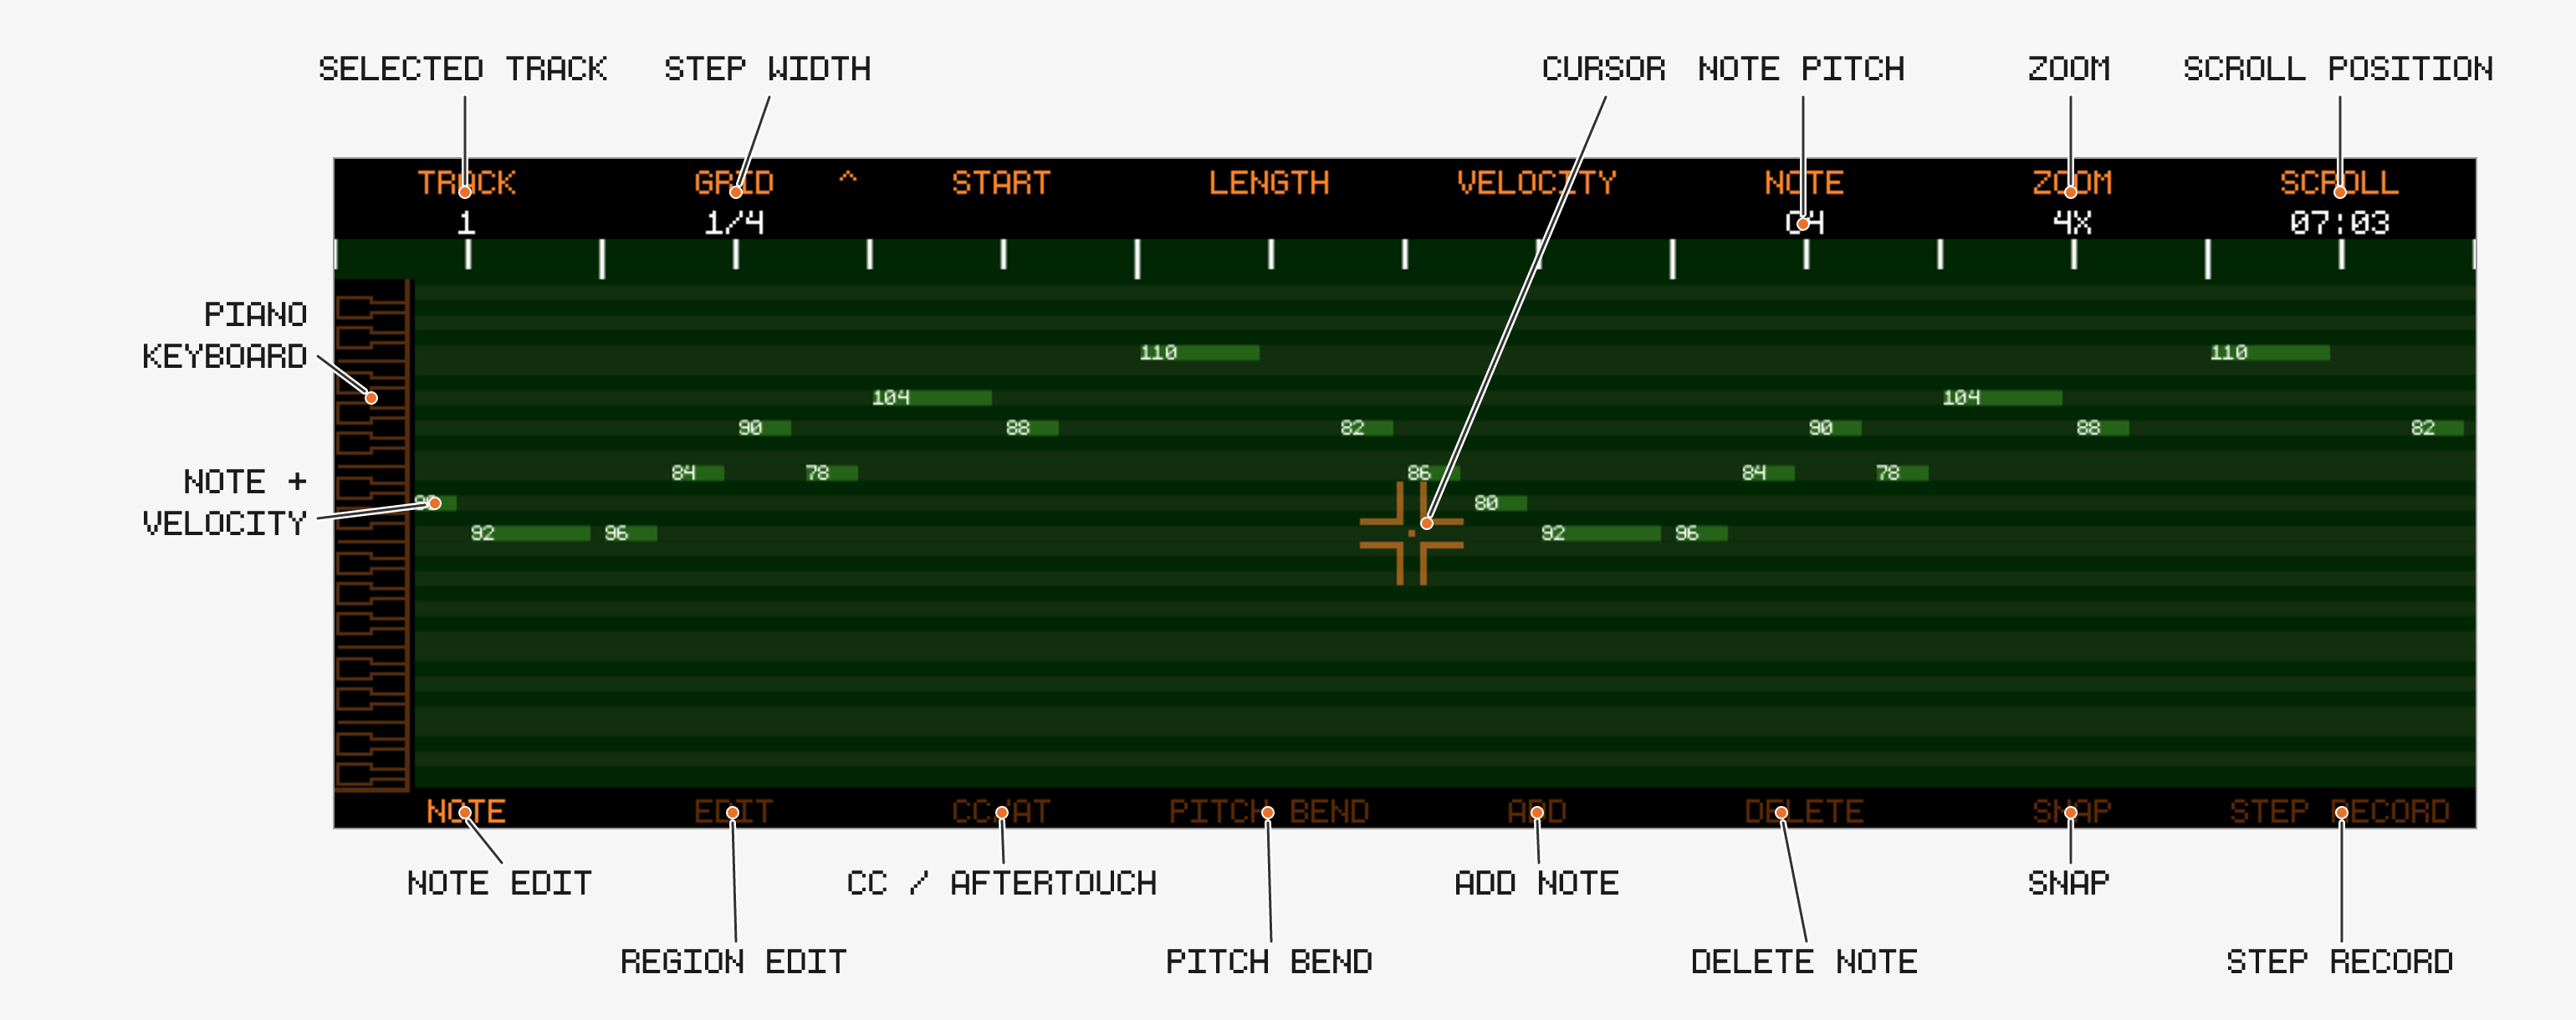
The MIDI Edit screen has four sub-views, selected with the first four Track Buttons:
Track Button
Sub-view
1
Note — select and edit single notes
2
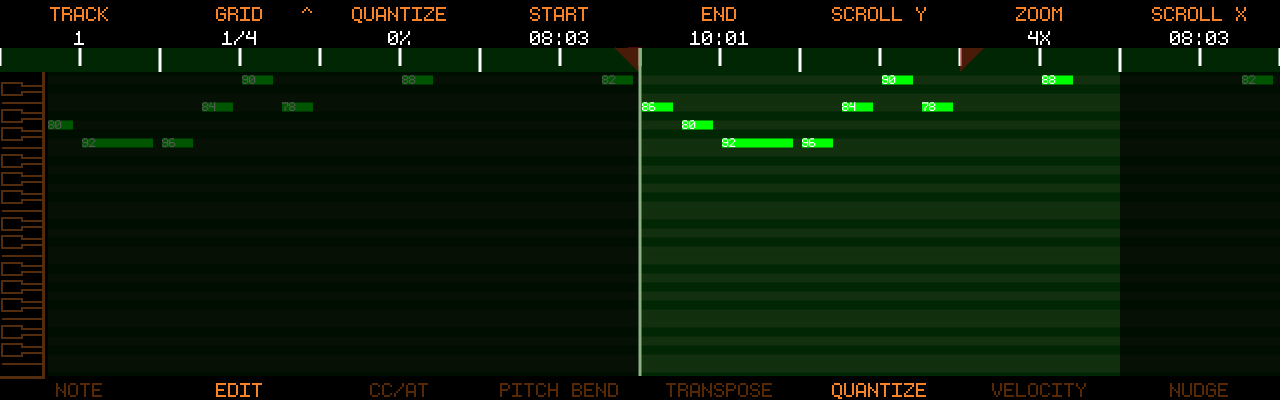
Edit — region tools: Transpose, Quantize, Velocity, Nudge
3
CC/AT — draw CC and Channel Aftertouch automation
4
Pitch bend — draw Pitch Bend automation
Controls shared by all sub-views:
Encoder 1: selected track
Encoder 2: GRID resolution — push to toggle triplets (new in v1.2.1)
Encoder 7: zoom — + push toggles the chromatic piano / profile rows when a MIDI Device Profile is bound (since v1.2.1)
Encoder 8: scroll along the timeline
Left/Right: nudge the playhead by grid steps, + Left/Right: jump between markers
+ Play: jump to the edit region start; playback stops at the region end unless LOOP is enabled (since v1.2.0)
Push Encoder 4 / Encoder 5 in the Edit view sets the edit region start/end at the playhead (since v1.1.2)
Selection off (since v1.2.2): press Track Button 2 again while in the Edit view to switch the selection off — the piano roll draws all bright, START / END read -, playback runs past the region end and + Play is the plain transport jump again. Turning or pushing Encoder 4 / 5 brings the selection back as it was (a turn only restores it, a push puts that end on the playhead); Cut / Copy and the edit actions show NO SELECTION while it is off. Entering the Edit view or the screen always starts with the selection on
If the track’s MIDI channel has a MIDI Device Profile
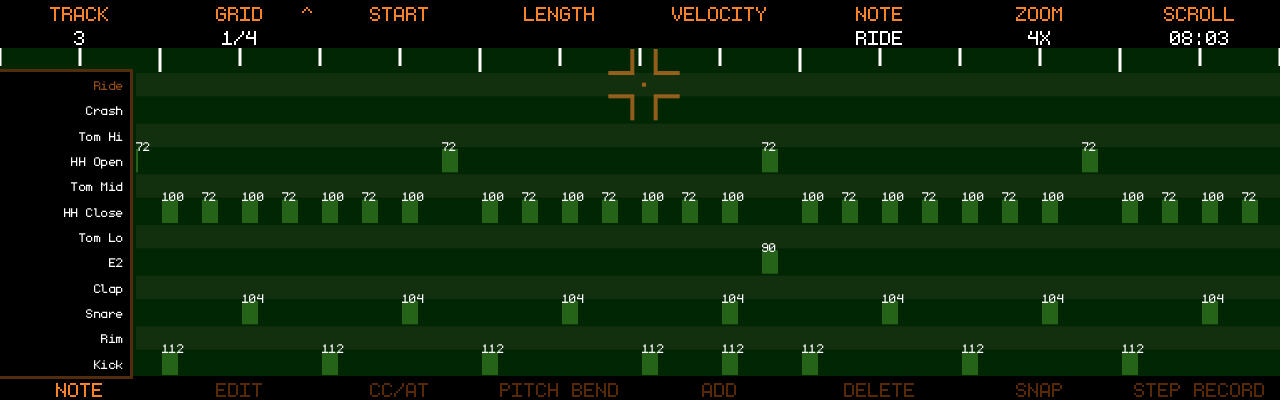
with named notes, the piano on the left is replaced by those names — one row
per drum sound, expanded to fill the screen for up to 15 rows (more rows keep a readable height and scroll around the cursor).
Notes with data that are not in the profile still get a row (labelled with the note name). The
note cursor (Encoder 6) steps from row to row; SNAP is off in this view.
The selected note is displayed bright, all other notes in the muted color. This makes velocity values easier to read and clearly shows which note is selected.
With Record off, Track 6 shows Play: it sends the selected note once to the track’s MIDI output channel, with its stored velocity and length, so you can check an edit without starting playback. Pressing again while the note still sounds retriggers it. The preview ignores the MIDI Monitor setting.
Played notes are added at the playhead, which advances automatically
Note length = grid size
While holding keys, press Right/Left to extend/shrink the note by grid steps
The note cursor follows what you play, so a note entered above or below the
visible range scrolls into view. A chord struck at once is centred when it
fits on screen; otherwise the view stays on the part nearest the cursor
(new in v1.2.1)
Encoder 4 / Encoder 5: set region start/end (push = set at playhead, since v1.1.2)
Push Encoder 8: move the whole region to the playhead
Encoder 3: adjust the selected tool’s amount — push Encoder 3 to apply
Cut/Copy in this view uses the edit region instead of marker bounds
Hold to Cut/Copy the region from all unmuted tracks at once — a soloed track counts as the only unmuted one (since v1.2.2). The Note, CC and Pitch Bend views do the same with the marker-bound region
A device profile tells Track8 what an external MIDI device understands:
which notes trigger which drum sound, and which CCs it listens to. Bind a
profile to a MIDI channel and every track sent to that channel gets:
a profile piano roll in MIDI Edit — one labelled row per named note
(Kick, Snare, HH Close …) instead of the chromatic piano, rows
expanded to fill the screen when only a few notes are configured
a CC selector that lists the device’s controllers, in the profile’s
order and with the profile’s names
Profiles are bound per MIDI channel, globally — a synth on channel 5 is
the same synth in every project. Binding lives in UTILITY → MIDI →
CH NAMES, next to the channel names.
Profiles are JSON files in midi_profiles/ on the Track8 SSD (next to
projects/). Edit them on a computer in USB-disk mode. On first start
Track8 creates the folder with a few examples to copy from: GM Drums,
TR-909, TR-808, Generic Synth.
The piano keys on the left are replaced by the note names; rows that are
not in the profile but carry data on this track still get a row, labelled
with the note name (E2), so nothing becomes unreachable.
Encoder 6 (note cursor) steps from row to row; moving or adding a note
works the same way — a note can only sit on a row.
Up to 15 rows (named notes plus any notes with data) → rows grow (up to
3× the chromatic row) and the block is centred; with more rows the labels
would become unreadable, so the rows keep their readable height and scroll
around the cursor instead (like the chromatic piano).
SHIFT + push Encoder 7 (zoom) toggles back to the chromatic piano
(and back again) for the session — e.g. to play a melodic part on a drum
channel.
SNAP helpers (TRKR / HARM) are off while the profile rows are shown.
CC/AT view (profile with controllers):
Named CCs = the profile’s list; Free CCs = every other CC, so a CC
the profile hides is still reachable there.
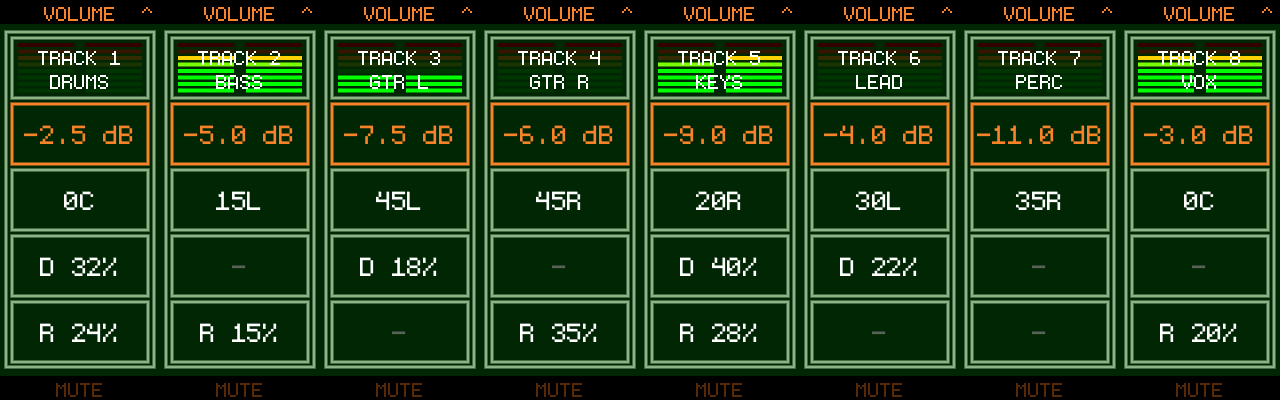
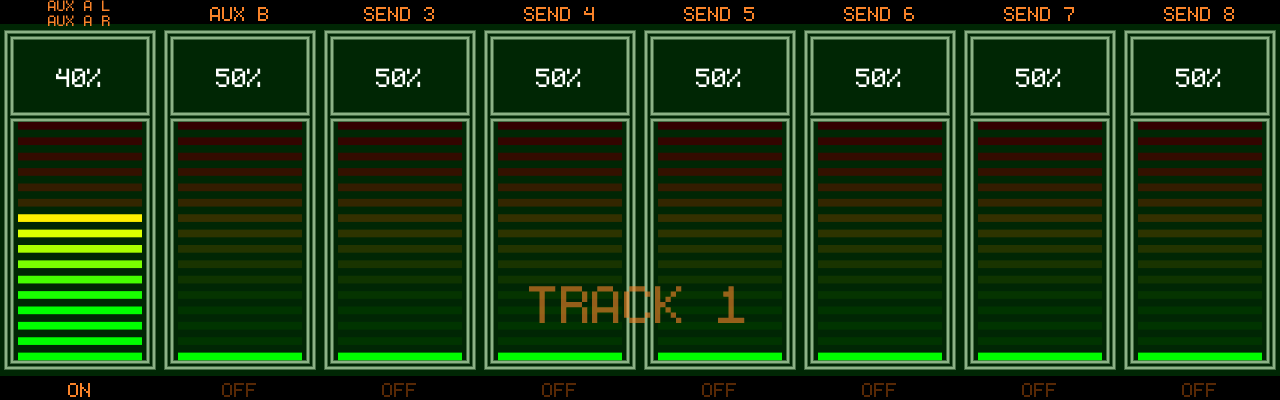
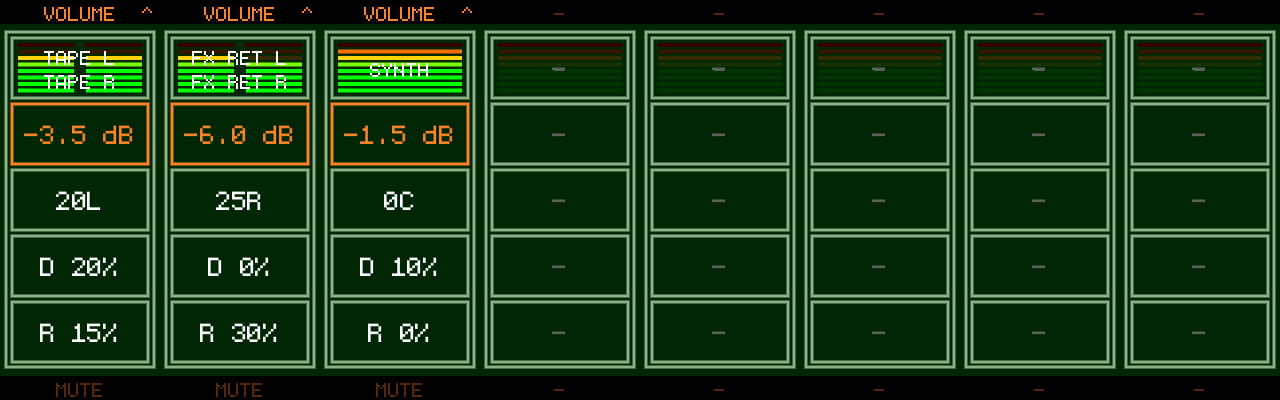
The Track Mixer (new in v1.2.1) shows all 8 audio tracks as classic mixer strips — level meter, volume, pan and the delay/reverb sends side by side — so you can balance a whole mix from one screen.
The strip meter shows the track’s post-fader output on the same 6 dB-per-bar scale as the Audio Overview meters: red at the top is 0 dBFS, and a track pushed past 0 dBFS by its own volume holds the red bar lit.
Muted strips are dimmed — including tracks silenced because another track is soloed. On silent tracks the MUTE button label lights up at full contrast: it is the way back. While a solo is active the soloed track’s label reads SOLO instead.
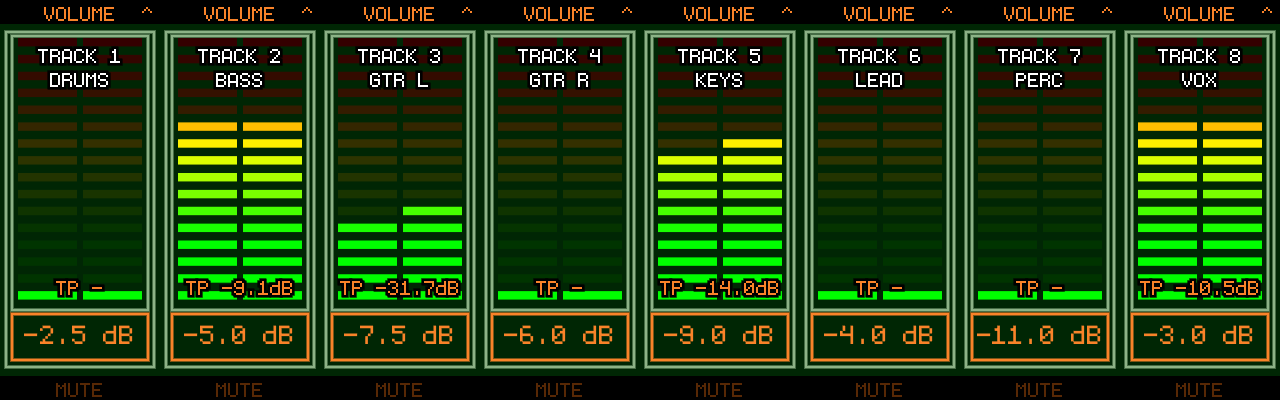
Touch the level meters to expand them into a full-height meter view (new in v1.2.1):
The meters use the finer Mastering-screen scale — 16 bars from +12 dBFS down to −55 dBFS, about 4 dB per bar
TP at the bottom of each meter is the track’s True Peak (dBTP) over the last 3 seconds, the same measurement as the TP 3s readout on the Mastering screen. It reads - while the track is silent. Ideal for gain staging — e.g. aim your input peaks at −12 dB
The box at the bottom shows each strip’s active parameter; the encoders keep working exactly as before (turn to adjust, push to cycle), as do mutes, solo, automation recording and Copy/Cut/Paste. Touching the box cycles the parameter, like pushing the encoder (since v1.2.2)
Touch the meters again to return to the normal channel strips. The mixer remembers which view you left it in.
Press to arm an automation-recording pass right from the mixer: the recording mode switches to ATM (automation only — recording from this screen never touches audio) and Record is armed; press Play and ride away (new in v1.2.1)
In ATM mode every track records: turning any strip’s encoder writes into its automation lane — no track selection or arming needed (new in v1.2.1)
While an automation-recording pass is running (ATM, or A+A started from the Audio Overview), the value flashes in the recording color while writing
A recorded automation pass undoes as a single step, no matter how many tracks and parameters you rode (in A+A mode the audio take and the automation pass are separate undo steps) (new in v1.2.1)
+ while recording aborts the pass: playback stops and the automation recorded in it is discarded
Values driven by an automation lane are rendered green and follow the playhead
The D and R sends record into their Track FX automation lanes
To edit the recorded curve afterwards, use + — Audio Edit opens on the parameter you last moved
Mixer encoders support MIDI Learn: hold an encoder for 2 seconds to open the MIDI Learn modal and map an external controller to that strip’s parameters. See MIDI Remote Control.
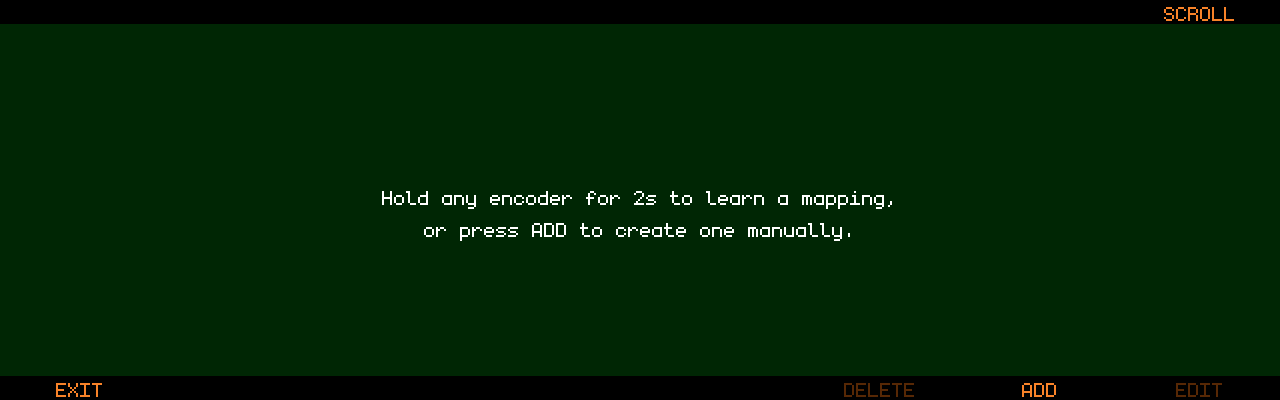
Track8’s encoders and most transport/edit buttons can be driven from an external MIDI controller — faders, knobs, buttons and jog wheels. Mappings are created either with MIDI Learn (hold an encoder) or manually in a mapping editor.
Mappings are global: they survive project switches and reboots
They are stored in a separate midi.json file next to main.json, so they can be backed up and copied between devices
MIDI Remote Control is only available on the Track8 hardware (not in the Companion App)
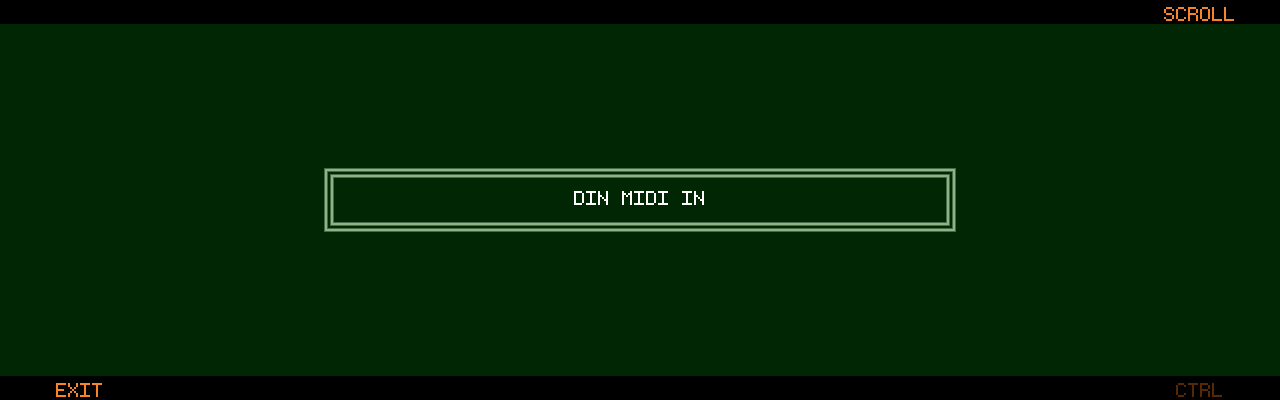
The list shows the built-in DIN MIDI IN plus every connected USB MIDI input
Scroll with Encoder 8, toggle the CTRL flag with Track Button 8 (or push Encoder 8)
EXIT (Track Button 1) returns to the MIDI settings
A device flagged CTRL becomes a control surface: its CCs drive your mappings and are no longer recorded into MIDI tracks. Devices you disconnect stay in the list greyed out, keeping their flag — they work again as soon as you plug them back in.
On a supported screen, hold any encoder for 2 seconds to open the MIDI Learn modal:
If the encoder has multiple functions (push states), select the function you want with Encoder 6
Move a knob/fader on your controller — the captured source appears as e.g. CC#74 ch 1 (it takes two consecutive messages to register, so a single stray event won’t latch)
CONFIRM with Track Button 6, or CANCEL with Track Button 3
A full sweep of the CC (0–127) always covers the full parameter range
A mapping drives the screen and function it was learned for, whichever screen is open: a Volume knob keeps working while you are on MIDI Edit, and the Audio Overview switches to VOLUME when you turn it. Cycling an encoder to another mode on the device never retargets your knob
Mappings learned on the Audio Overview’s SCROLL page follow the overview that is on screen (since v1.2.2): while the MIDI Overview is showing, the same knobs drive its scroll step, MOVE MARKER, SPLICE, zoom and scroll, and the MIDI Overview switches to SCROLL. Each overview keeps its own step and zoom, as with the encoders on the device. Volume, Pan and the return mappings always drive the Audio Overview
Audio Overview encoders are per-track: a mapping on Encoder 3 always drives Track 3. Map all 8 encoders for a full fader bank — or create a SEL mapping in CONTROL that drives whichever track is selected (see Following the selected track)
Track FX and Track Sends mappings learned this way are locked to the track (and filter node) that was selected when you learned them. To make one follow the selected track instead, edit it in CONTROL and set TRACK to SEL
Source kind: CC or NOTE. NOTE is for button mappings only, so pads and keys can fire actions (since v1.2.2)
Encoder 2
CC or note number (0–127)
Encoder 3
MIDI channel (1–16 or ANY)
Encoder 4
Target screen
Encoder 5
Target encoder (1–8, or SEL = the selected track’s encoder on the Audio Overview / Track Mixer) or button action
Encoder 6
Function (only for encoders with multiple modes — e.g. Volume / Pan / sends on the mixers, per-node Frequency / Q / Gain (N1 FREQ … N4 GAIN) and Attack / Sidechain on Track FX, the delay / reverb / mastering pickers)
Encoder 7
Mapping mode: ENC (encoder) or BTN (button)
Encoder 8
Track binding on Track FX / Track Sends: SEL (follows the selected track) or a fixed track 1–8 (since v1.2.2)
While the modal is open, incoming CCs from your control surface auto-fill the CC number and channel — just wiggle the control you want to use. In BTN mode a pad or key does the same: its Note On fills in NOTE, the note number and the channel (since v1.2.2).
The list shows each mapping’s binding: Audio Overview / Enc SEL / Volume, Track Fx SEL / Enc 2 / N1 FREQ or Track Fx Track3 / Enc 2 / N1 FREQ.
If you know the auto channel on Elektron boxes — one MIDI channel that always addresses the active track — this is the same idea: map a set of knobs once, and they control whichever track is selected on the Track8. Press a track button, and the same knobs now tweak that track.
These mappings are created manually in UTILITY → MIDI → CONTROL (ADD), not with MIDI Learn:
Audio Overview / Track Mixer (Encoder N = Track N): turn Encoder 5 past 8 to SEL. The mapping drives the selected track’s Volume, Pan, sends, … — whatever you pick as the function
Track FX / Track Sends (one track on screen at a time): leave Encoder 8 (TRACK) on SEL. Pick the function with Encoder 6 (Frequency / Q / Gain per filter node — N1 FREQ … N4 GAIN — Attack / Sidechain, Release, Threshold, Gain, sends). Set TRACK to 1–8 instead to lock the mapping to one track, which is what MIDI Learn does when you hold an encoder
The selected track is the one highlighted on the Audio Overview, Track Mixer, Track FX and Track Sends screens — a Select button mapping (see below) switches it from your controller, so a controller page with 8 select pads plus one set of knobs covers all 8 tracks
Tips:
A SEL mapping and a fixed-track mapping for the same function can coexist, as long as they use different CCs. Keeping the follow set on its own MIDI channel (e.g. channel 16) makes that easy to organise
Track8 applies knob movement relative to the last position it saw, so switching tracks never makes a value jump — but a knob’s physical position does not reflect the newly selected track’s value until you move it
Manually created filter mappings name their node (N1 FREQ …), so a follow mapping addresses the same node on every track. Map all twelve for full filter control from your controller
Set Encoder 7 to BTN in the Add/Edit modal. Button mappings are momentary: the action fires once when the CC value rises to 64 or above, and re-arms when it falls below 64 — perfect for pads and momentary switches.
A button mapping can also listen to a note instead of a CC (since v1.2.2): set Encoder 1 to NOTE, or simply hit the pad while the modal is open. The action fires on Note On at any velocity and re-arms on Note Off. A note and a CC of the same number are different sources, so both can be mapped. Notes only reach MIDI Control from a port flagged CTRL on the device screen, like CCs — they are not recorded or passed through. Encoder mappings stay CC-only: a note has no value to turn a parameter with.
Global actions (work on every screen):
Play, Record, Left, Right, Shift Left / Shift Right (marker jump), Loop Tgl, Loop In, Loop Out, Punch Tgl, Set Marker, Cut, Copy, Paste, Locate 1 … Locate 8 (see Locators), Free Bar (jump to the next empty bar, see FREE BAR; since v1.2.2)
Audio Overview actions: Select / Mute / Solo / Arm for each of the 8 tracks
MIDI Overview actions: Select / Mute / Solo for each of the 8 tracks
Locate 1 … Locate 8 turn eight pads or buttons on your controller into a locator row, like the numbered locate keys of a tape machine (#316).
Which marker a number means is decided by the marker’s label: a label that starts with the number is that locator — 1 Verse, 2. Chorus, 3-Solo, or just 4. Name your markers in the marker edit screen as usual; the number is visible on the timeline and stays with its marker when you add, move or reorder markers
The leading digits are read as one number: 12 Bar Blues is 12, not locator 1. Only 1 to 8 can be addressed
Several markers with the same number: the earliest one on the tape wins
No marker with that number: NO MARKER 3 appears briefly and nothing moves
The jump is immediate, stopped or playing, like Shift Left / Shift Right from a controller
Create the mappings in CONTROL with ADD: Encoder 7 to BTN, Encoder 4 to Global, Encoder 5 to Locate N, then hit the pad. They cannot be learned by long-press, as there is no control on the Track8 to hold
Map a jog wheel to the Scroll function (e.g. Audio Overview → Scroll). Scroll mappings use relative CC decoding instead of absolute positions, so an endless wheel works without end stops:
Sign-magnitude encoding (e.g. Korg nanoKONTROL) is detected automatically
Two’s-complement / Mackie-style encoding (e.g. Behringer X-Touch, most DIY jog wheels) is detected as well (improved detection new in v1.2.1)
Set your controller’s encoder to a relative CC mode if it offers one.
Each CC can control exactly one function, and each function can be controlled by exactly one CC. If a mapping you learn or save would collide with an existing one — same CC source or same target — Track8 shows a warning listing what would be replaced, and the confirm button changes to REPLACE. Confirming removes the old mapping; cancelling keeps it.
Tip: since a channel setting of ANY intercepts that CC on every channel, two mappings for the same CC number on different channels only work if neither is set to ANY.
→ Master FX. Press again to cycle Master FX → Mastering → External Inputs (new in v1.2.1; External Inputs only with an external interface, see External Audio)
→ Track FX. Press again to cycle Track FX ↔ Track Sends (new in v1.2.1; Track Sends only with an external interface)
The arrow keys are free in all FX screens — navigate the tape without leaving the screen (new in v1.2.1)
With an external audio interface, each track gets 8 additional aux sends to hardware outputs:
Press again while on Track FX
Encoders 1-8 set the send level for sends 1-8
Track Buttons 1-8 toggle each send on/off; + Track Button selects the track
Sends are true post-fader sends, summed per bus across all tracks and routed straight to the output pairs configured under SENDS in the Audio settings — see External Audio
Encoder 1: Time — ms or beat-synced (push to toggle). Synced values are note lengths from 1/1 to 1/64: 1/4 is a quarter note in every time signature (fixed in v1.2.1)
Encoder 2: Feedback / Width / Mod Rate / Mod Depth (push to cycle)
Track Button 1: Delay on/off — off mutes the delay return; the track sends themselves are unaffected (since v1.2.1, previously the sends passed through dry)
The delay time can be modulated by an LFO — this turns the delay into a chorus or flanger:
Mod Rate (0.1–10 Hz) — LFO speed
Mod Depth (0–20 ms) — how far the delay time swings; 0 ms = LFO off (default)
Width — with modulation active, Width also sets the L/R phase offset of the LFO: 0% = both channels move together (mono chorus), 100% = 180° apart (wide stereo). When Ping-pong is on, Width additionally controls the ping-pong spread as before.
Shift + Encoder 2 = fine steps
Recipes: Chorus — Time 15–30 ms, Feedback 0–20 %, Mod Rate 0.3–1 Hz, Mod Depth 2–5 ms. Flanger — Time 10 ms, Feedback 50–80 %, Mod Rate 0.1–0.5 Hz, Mod Depth 1–3 ms. The radar’s time arc wobbles to indicate rate and depth.
The Mastering screen shows a realtime spectrum of the master output. It is fed post-limiter, so it always shows what actually leaves the device — even with Mastering bypassed.
SOUNDCARD (Encoder 1): select the interface (must be class-compliant)
MODE (Encoder 3): MULTI records multiple tracks at once, SINGLE is the classic one-track workflow
MON (Encoder 5): internal monitoring — routes the main mix to Track8’s own headphone output (useful for rack interfaces). Locked ON for input-only interfaces
RATE (Encoder 6): 48k / 44.1k (since v1.1.1)
BUFFER SIZE (Encoder 7/8): some interfaces need a higher buffer. Push the encoder to switch to PERIODS (3-5, default 3) if you get crackles at your preferred buffer size (new in v1.2.1)
Track Button 8 (APPLY): apply changes and restart the audio engine
⚠️ 44.1kHz is a last resort (since v1.1.1). Track8 always runs at 48kHz internally — at RATE 44.1k all incoming/outgoing audio is resampled (in the worst case input/send/return/output resamples 4 times). This degrades audio quality and costs performance. Only use it if your interface cannot run at 48kHz.
Channels can be set to - to disable them, e.g. when using Track8 purely as a USB soundcard front-end (since v1.2.0)
ALT METRON (Encoder 8, new in v1.2.1): route the metronome to separate output channel(s). When set, the metronome is removed from the main mix and only sent there — perfect for a drummer’s cue mix. One channel = mono, both = stereo
Press the Settings button to open the Settings screen (since v1.1.3 no
SHIFT needed — SHIFT + Settings opens the USB Browser instead).
Press Settings again to cycle to the Utility screen and
back (new in v1.2.1).
Shortcuts from the Settings screen:
Hold Settings + press Audio — open the Soundcard settings
Hold Settings + press Midi — open the MIDI settings
30–360. Push to switch between whole BPM and decimals (new in v1.2.1). Whole mode: SHIFT = steps of 10. Decimal mode: steps of 0.01, SHIFT = 0.1
2
MEASURE
Time signature. Push to cycle numerator (1–32) / denominator (1–64, powers of 2)
3
METRONOME
OFF / REC (only while recording) / ON. Push to switch to the metronome level. Beats follow the time signature’s denominator — in 7/8 it clicks every eighth with the accent on 1 (fixed in v1.2.1)
4
COUNT IN
OFF or 1–16 beats, counted in the same beat as the metronome (7 beats = one bar of 7/8)
5
OVERDUB
ON / OFF
6
RECORDING
A && M records Audio and MIDI together, A || M records only the domain you are in
7
FOOTSWITCH
PLAY / RECORD / HOLD REC / TUNER / MARKER
8
AUDIO MON / MIDI MON
Push to cycle (MIDI MON new in v1.2.1). OFF / ON / PUNCH — PUNCH monitors only while the playhead is inside the punch brackets, whether or not punch recording is armed, so you can rehearse a punch-in and hear exactly what the recorded result will sound like (new in v1.2.1). Audio: switch OFF when using speakers and a microphone. MIDI: controls whether input is echoed to MIDI Out
Track buttons:
TAP TEMPO (Track 1) — tap at least twice to set the BPM
TRK NAMES (Track 6) — name your audio and MIDI tracks
BROWSE (Track 7) — open the Project Browser (see below)
EXPORT (Track 8) — export a mix or stems to USB, or bounce to a track
(since v1.2.0)
Bouncing to a track overwrites that track’s audio from the insert point
on — and a track is the default destination whenever no USB stick is
plugged in. EXPORT therefore asks first: OVERWRITE (Track 6)
goes ahead, Cancel (Track 3) leaves the track untouched
(since v1.2.2)
Confirmation dialogs — this one, the delete prompts, tape truncate —
can also be answered by tapping the on-screen buttons, and every other
control is locked until you answer
(since v1.2.2)
The Settings screen stays reachable during a take — that is how you toggle
the metronome mid-pass. Controls that would break the recording (BPM, tap
tempo, time signature, overdub, recording mode, and the doors to Utility /
Track Names / Browse / Export) are refused with an on-screen error while a
take is rolling (new in v1.2.1).
A template is a project without content: it keeps the settings (BPM,
time signature, metronome, record modes), track names and colours, MIDI
channels, mixer levels / pans / mutes, Track FX, sends, Master FX and
Mastering, external channel mapping and grid preferences — but no audio,
MIDI, automation, markers, loop or punch. It also carries a setup: the
audio interface configuration, MIDI sync settings, threshold record and
tuner settings (channel names and device profiles stay as they are).
+ SAVE AS → SAVE TMP saves the current project’s settings as a template
Templates are listed at the bottom of the browser as TEMPLATE: <name>
(no waveform preview). With a template highlighted, LOAD turns into
FROM TMP: enter a name for the new project (a random one is
suggested) and it is created from the template
RENAME and + Track 6 (delete) work on templates too
The template’s setup is applied when the project is created. The active
audio interface itself is never switched automatically: if the template
was saved with a different interface, a hint asks you to select it in
UTILITY → AUDIO
Templates live in templates/ next to projects/ on the SSD
Projects load faster since v1.2.1: the waveform overview is cached with the
project. The first load of an older project (or after editing its files
outside Track8) rebuilds the cache and may take a moment longer.
You can also let Track8 ask for a new project on every start — see the
AT STARTUP setting in Utility (since v1.1.4).
Whenever a name is needed (projects, tracks, markers, exports) the input
keyboard opens:
Tap SHIFT on the keyboard for one uppercase letter; double-tap for
Caps Lock, single tap to exit it (since v1.1.3)
Left / Right buttons move the text cursor; the Record button
deletes the character at the cursor (new in v1.2.1)
When creating a new project, push Encoder 8 (dice) to generate a
random project name (since v1.1.3)
A standard USB keyboard can be used to type; only characters present on
the touch keyboard are registered, and Enter confirms (new in v1.2.1)
Names that end up on disk (projects, templates, backups, exports, saved
WAV / MIDI clips) cannot contain / \ : * ? " < > | — those keys are
greyed out and ignored, and a name made only of dots cannot be confirmed
(new in v1.2.1)
Global device settings that apply to every project. Open the Settings
screen and press UTILITY (Track 2) — or simply press Settings twice
(new in v1.2.1). EXIT (Track 1) returns to Settings.
Encoders with a ^ symbol hold more than one setting — push to cycle.
Encoder
Setting
Values
1
SHIFT NAV
MARKER / BEATS — what SHIFT + ← → does: jump between markers or by single beats
2
SHIFT HOLD
OFF / NAMES — show the track name overlay while SHIFT is held
3
TIMED JUMP
OFF / AT BEAT / AT BAR — with MARKER navigation, marker jumps during playback wait for the next beat/bar so you stay in time
5
AT STARTUP
LAST PRJ / NEW PRJ — with NEW PRJ, Track8 offers a fresh project (with a generated name) on every start (since v1.1.4)
6
Feature toggles (push to cycle)
see below
7
THEME / SHADER / TEMP
Select a color theme (including a colorblind theme, since v1.1.3). Push to cycle to SHADER — the display filter: OFF, BLOOM (the horizontal glow, the former ON), CRT (phosphor glow, soft scanlines, shaded corners), SCANLINE (the lines and corners without the glow), SOFT (a light anti-aliasing blur), SHARP (crisper text and edges) and, only while a bin/static/bloom.glsl of your own exists on the SSD, CUSTOM (that file) — and once more to TEMP, the display colour temperature from 6500 K (neutral) down to 2500 K in steps of 500 K, which warms whichever filter is active, OFF included. A change takes effect about half a second after the last click, with a brief flicker while the screen compositor restarts (since v1.2.2; Track8 hardware only — the companion app stores the setting but shows no filter)
8
BRIGHTNESS / STANDBY
Screen brightness. Push for Standby: OFF / 1m / 5m / 15m / 30m / 60m of inactivity before the screen dims to a screensaver — only while playback is stopped; any key wakes it up (since v1.1.3). Playback and recording count as activity, so the timer starts when the transport stops, whether it was stopped on the device or over MIDI (since v1.2.2)
All of these (together with SHIFT NAV, SHIFT HOLD, TIMED JUMP and OVERDUB)
are also one touch away on the overviews: touch and hold the track area
of the Audio or MIDI Overview to open the Quick Settings panel, see
Touch (since v1.2.2).
MKR LEG — draw a vertical line under each marker for easy visual
reference (since v1.1.4). On the overviews the legs stop at the track
area, like the waveform, so the input/output meters stay clear of them
(since v1.2.2)
MOD HI — highlight pasted/modified audio in orange until the next
edit or view switch (since v1.1.4). During multi-take
recording nothing is highlighted
while the takes are still open; the take you kept is highlighted once
the session ends (punch off) (since v1.2.2)
SCROLL SND — tape-style FFW/RWD sound while navigating and scrolling
(since v1.1.5). A SHIFT + Play jump is voiced too: a short fast-wind
sweep whose loudness traces the material between the playhead and the
target (since v1.2.2)
SHIFT PLAY — START / MARKER 1: where SHIFT + Play jumps
(since v1.1.5). Reads START MKR while a marker carries the
start flag: SHIFT + Play then always goes
to that marker, and the setting takes over again once the flag is removed
(new in v1.2.2)
PASTE JMP — after a paste, jump the playhead to the end of the pasted
region to quickly fill the tape with a repeating pattern (since v1.2.0)
TAPE SND — tape-stop effect on stop: OFF / 0.4s / 0.8s / 1.5s tail
(new in v1.2.1)
BIG TIME — a big translucent overlay on the left half of the Audio and
MIDI Overview, readable from across the room
(new in v1.2.1).
Shows the time / bar-beat readout (T 00:00 / B 01:01) with the
markers between them — current > next — and a progress bar with a
bars:beats countdown to the next marker below; name your markers
after chords or song sections and read the changes while playing.
Unnamed markers show as their number (M: 3); after the last marker the
next slot reads M: - and the countdown --:--
(marker info since v1.2.2).
Also toggled by touching the time / beat readout at the bottom of
either overview (since v1.2.2):
The soundcard setup — internal converters or a class-compliant USB
interface. See External Audio for details.
SOUNDCARD — Internal or a connected USB interface
BUFFER SIZE / PERIODS — buffer size, and 3–5 audio periods for
external interfaces (PERIODS new in v1.2.1); the resulting round-trip
latency is shown
RATE — 48k / 44.1k: last-resort compatibility mode for interfaces
that cannot run at 48 kHz; audio is resampled and quality/performance
suffer (since v1.1.1)
MODE — SINGLE / MULTI track input mode
Sub-pages: TRK IN (or CH 1/2), INSERTS, SENDS,
EXTERNAL, MAIN OUT, IO NAMES — on MAIN OUT an
ALT METRON channel can be selected to route the metronome to its own
output instead of the main mix (new in v1.2.1)
Shows the installed Track8 firmware version (since v1.1.3)
REBUILD WAVEFORM — throw away the stored waveform overview of the
current project and re-read it from the tape. Use this if the drawn
waveform no longer matches the audio (new in v1.2.1)
SHOW FPS / SHOW LATENCY / SHOW MEMORY — on-screen
performance overlays
DEBUG LOG — verbose logging
LOGS → USB — copy the device logs to a USB stick for a support
request
The Track8 companion app runs the same firmware as the hardware natively on
iPad and on Apple-silicon Macs. The device image is a fully working control
surface — tap the encoders and buttons to operate it — and the screen in the
middle is the real Track8 UI, rendered live. External audio inputs and
multitrack recording remain hardware-only features.
Two touch buttons live in the corners of the window, outside the device:
Corner
Button
What it does
bottom-left
ⓘ
Info overlay: labels every encoder and button with what it does on the current screen (hold SHIFT to see the shifted actions)
The theme editor lets you build a color theme while watching the real UI
change, instead of guessing from static previews. It uses the same
theme.json format as the hardware (and the
web theme editor), so anything you
make here can go straight onto your Track8.
Tap 🎨 in the bottom-right corner. Panels appear above and below the
device listing every themeable color by name, grouped into General,
Encoders, Audio tracks, MIDI tracks, Markers and FX curves.
The editor starts from the theme currently selected under
Utility → THEME (DEFAULT included).
Tap a color swatch to open the system color picker. Every change is
applied to the rendered screen immediately — keep operating the device
(switch to the MIDI overview, open Track FX, mute a track, …) to see
exactly which elements the color affects. Opacity is part of the color.
Type a name into the text field and tap SAVE. The theme is written to
the app’s theme.json and becomes the selected theme, so it also shows
up under Utility → THEME. Saving under an existing name asks before
replacing it. REVERT throws away unsaved changes and reloads the
selected theme.
EXPORT opens the share sheet with the app’s theme.json (all your
themes, plus any you imported). Save it to Files, AirDrop it, or mail it,
then copy it over the bin/theme.json on your Track8 — it is a drop-in
replacement.
IMPORT picks a theme.json from Files and merges its themes into the
app’s list (same-named themes are replaced). Use it to bring themes from
the web editor or from your Track8 into the app.
Closing the editor (🎨 again, or opening the info overlay) discards unsaved
changes after asking for confirmation and restores the selected theme.
After updating, the first load of each project may take a little longer
while the waveform overview is rebuilt (since v1.2.1 projects then load
faster).
Some screens (USB Browser, Utility sub-screens) cannot stay open during a
take. Since v1.2.1 such actions are refused with an on-screen error while
recording — the red border around the screen shows that a take is rolling.